DYIng lights to my ebike.
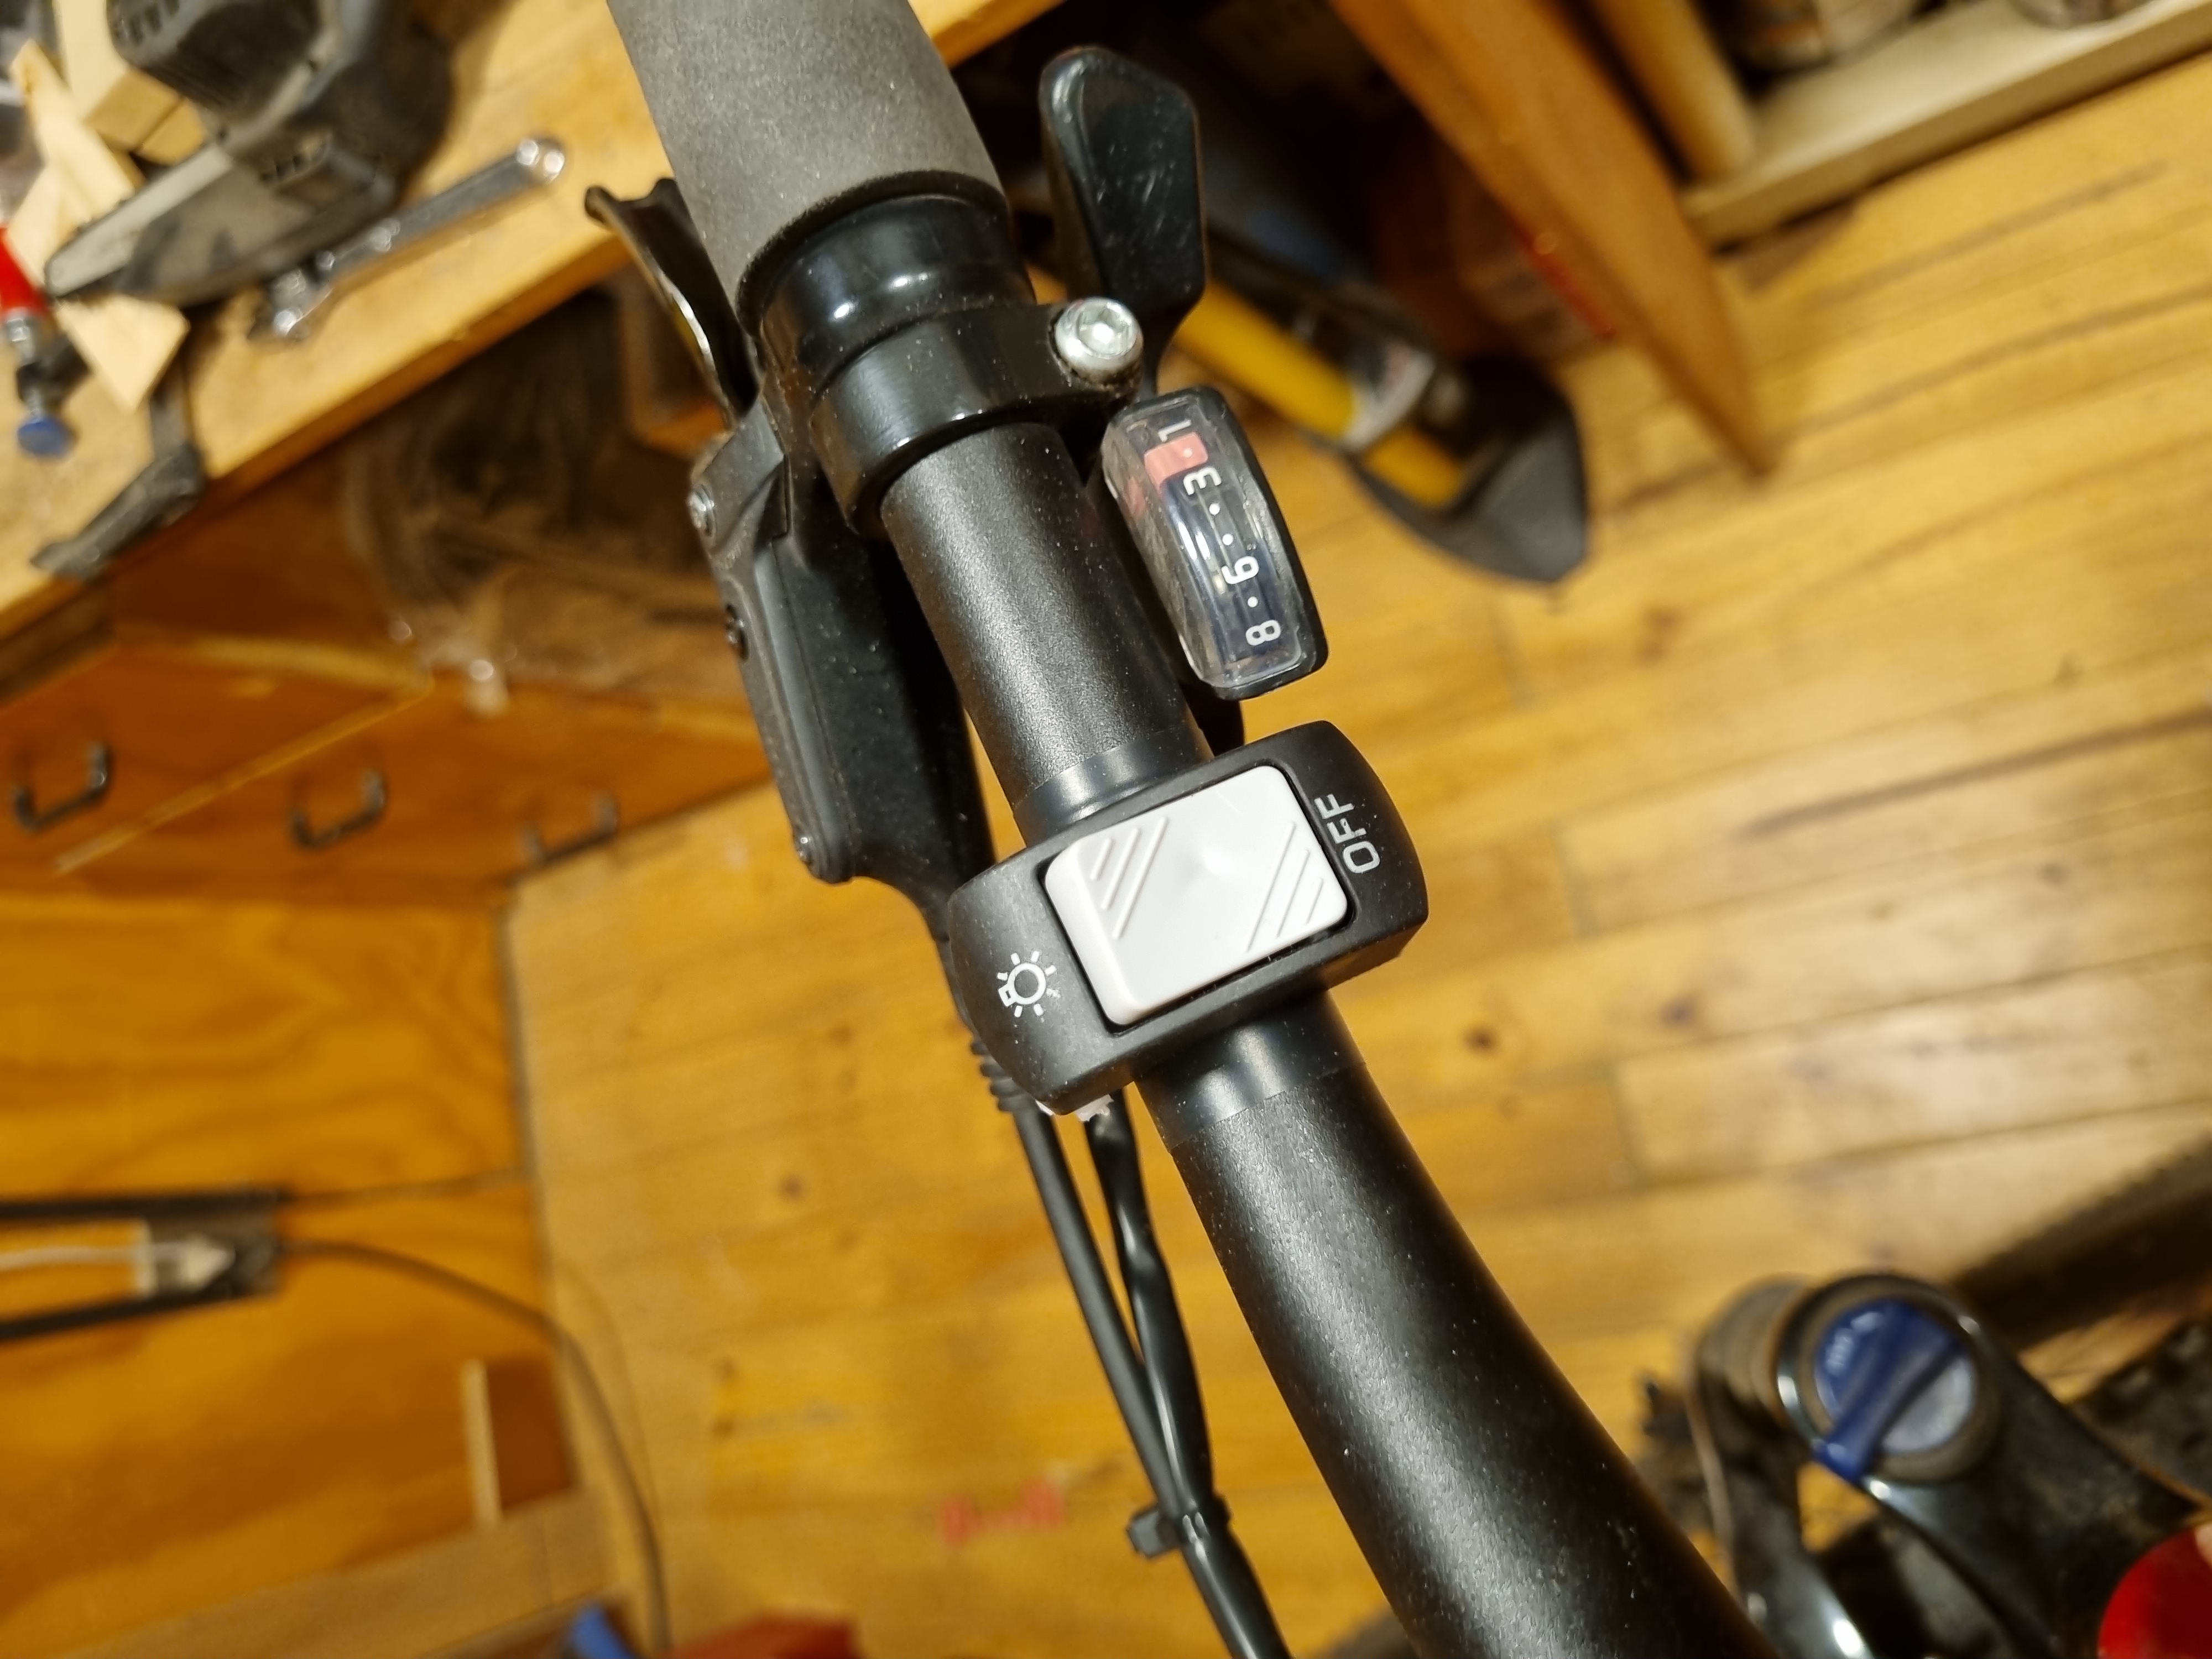
I have a Trek Marlin 6 which has a Bafang BBS02 48V electric conversion kit with a 14 Ah battery pack. Considering the size of the battery, adding lights that could use the battery to power them and not have to worry about charging them separately sounded like a good idea. The issue with this, is that while most brand-name electric bicycles with Brose, Bosch, Yamaha or Shimano drive trains sometimes come with an auxiliary power output for lights, the Bafang BBS02 has 6V 0.5A auxillary output, which is not enough to power most lights. This auxiliary connector is turned on whenever I turn on the display backlight on the trip computer, so I toyed with the idea of using a relay to turn on the lights whenever the display backlight was on, but mostly due to laziness and the fact that I wanted something simple that I could do in a single day, I got a handlebar-mounted switch instead.
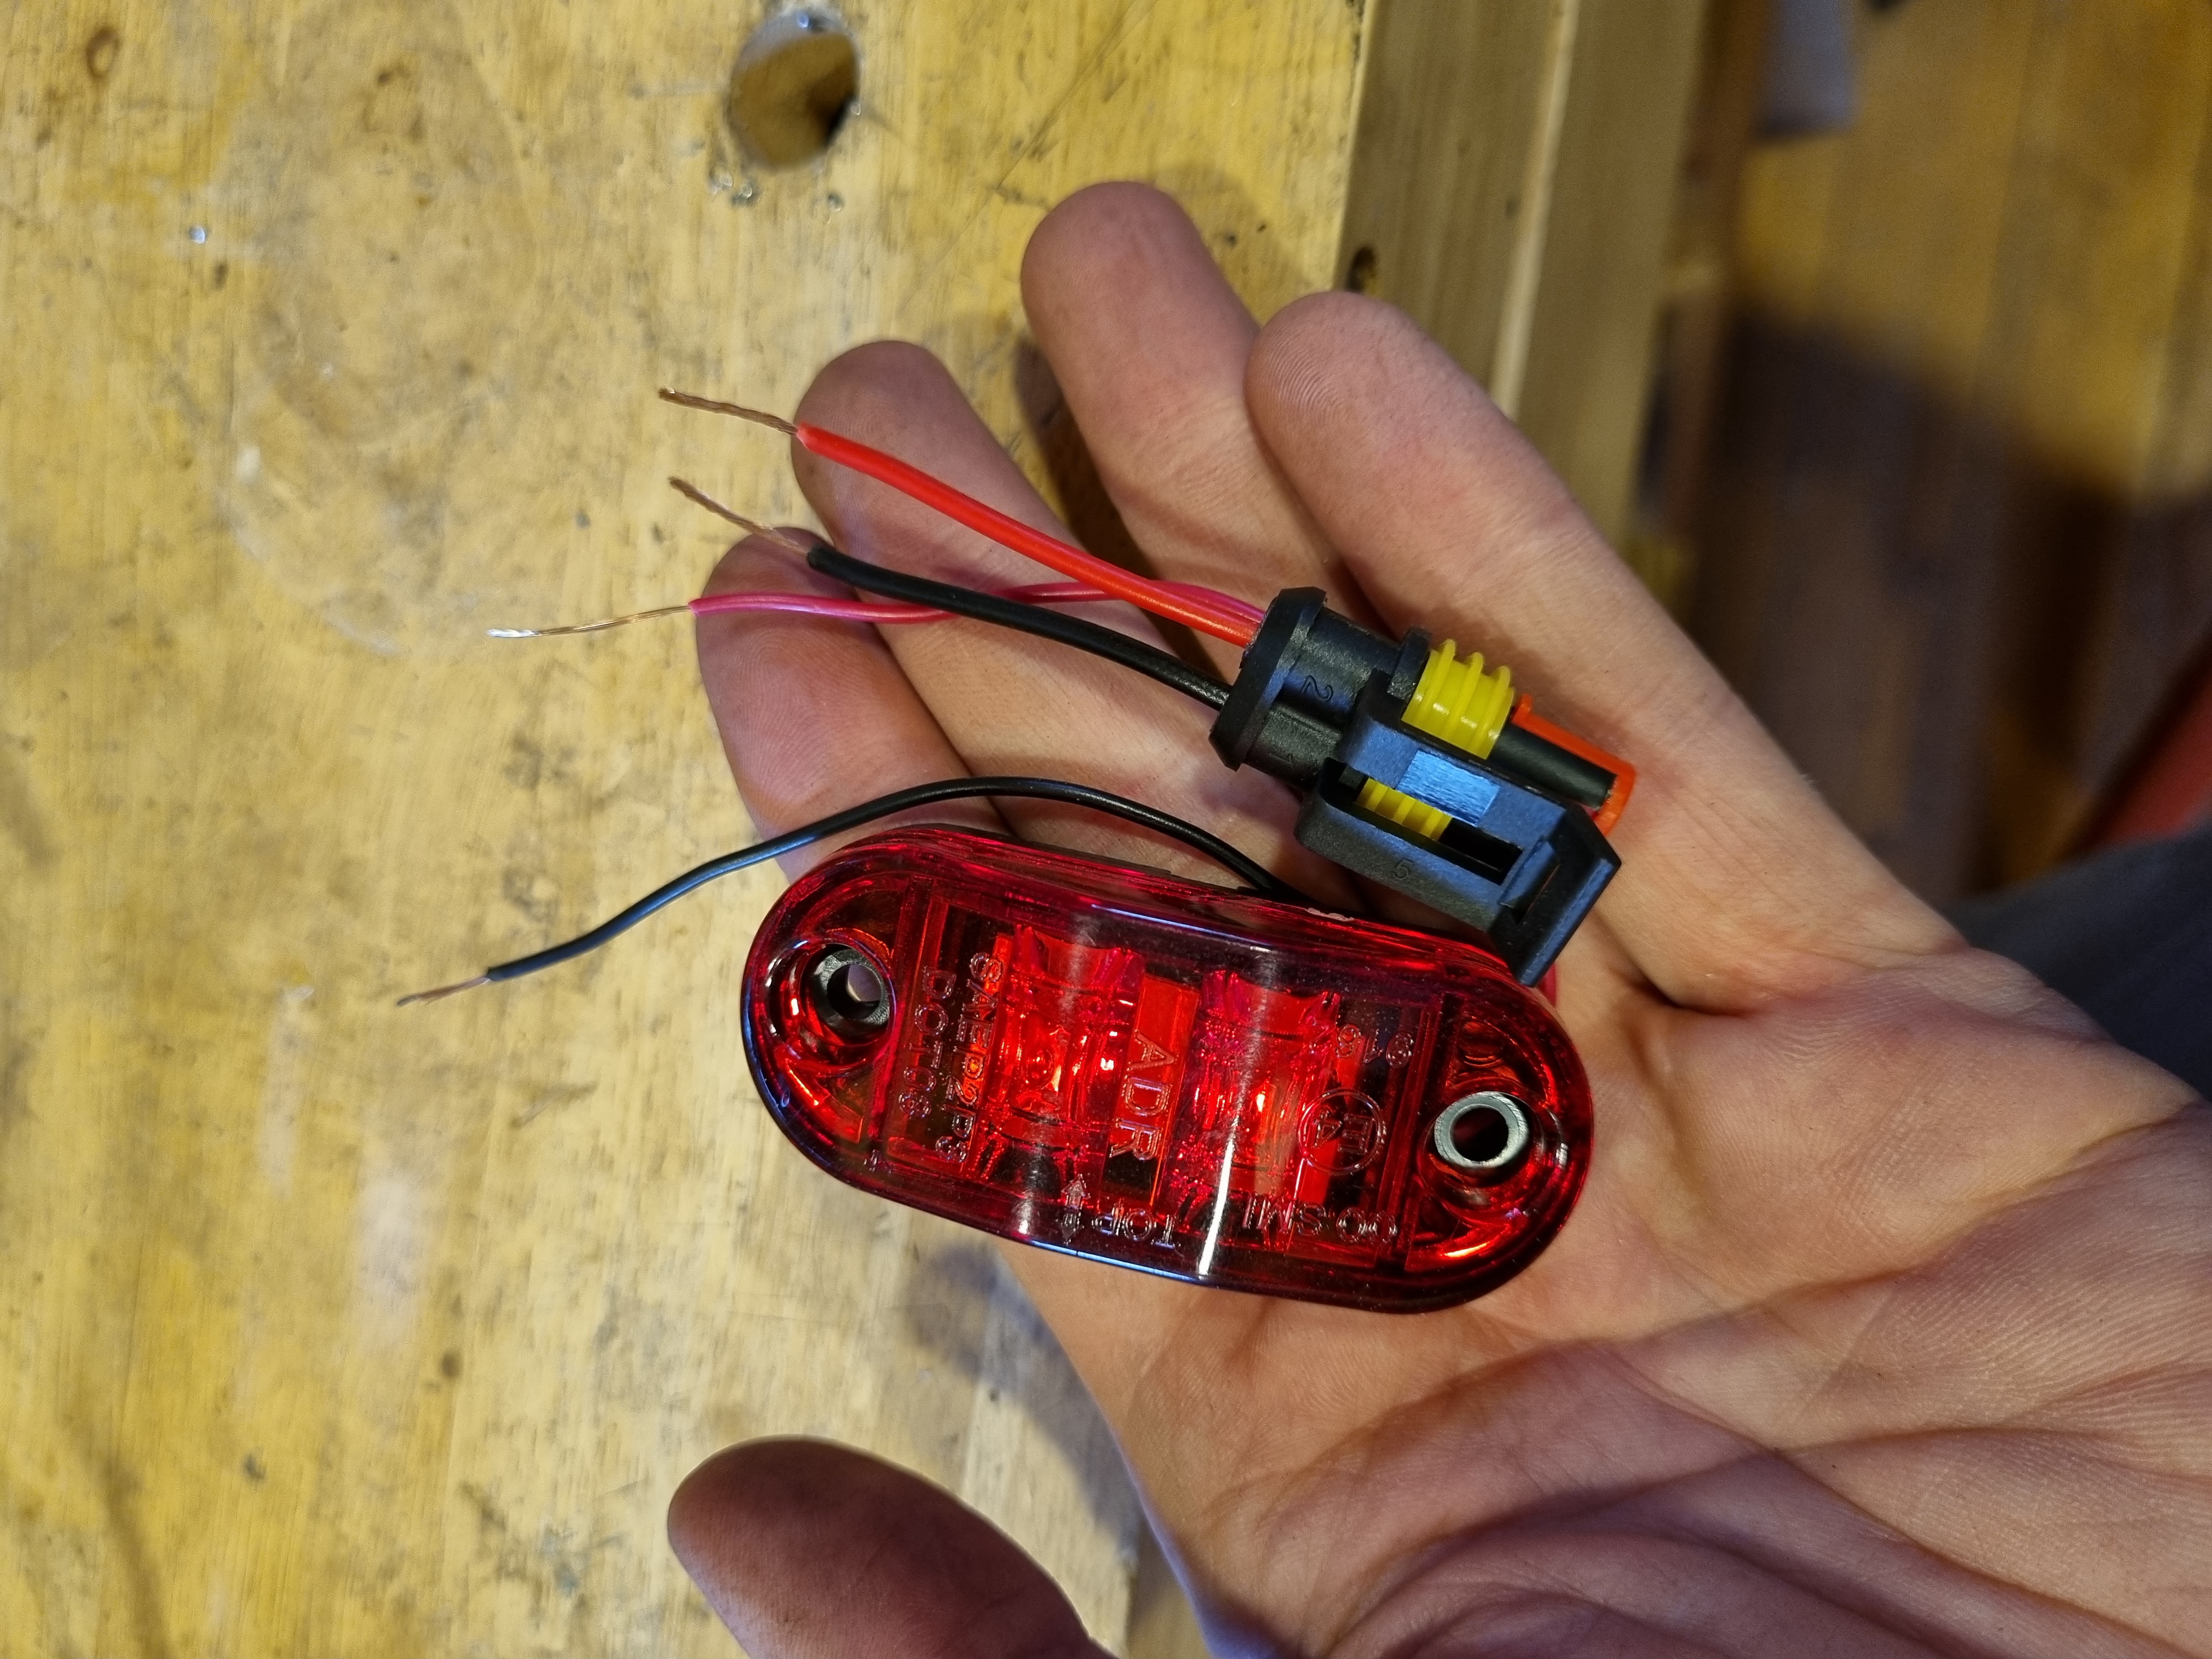
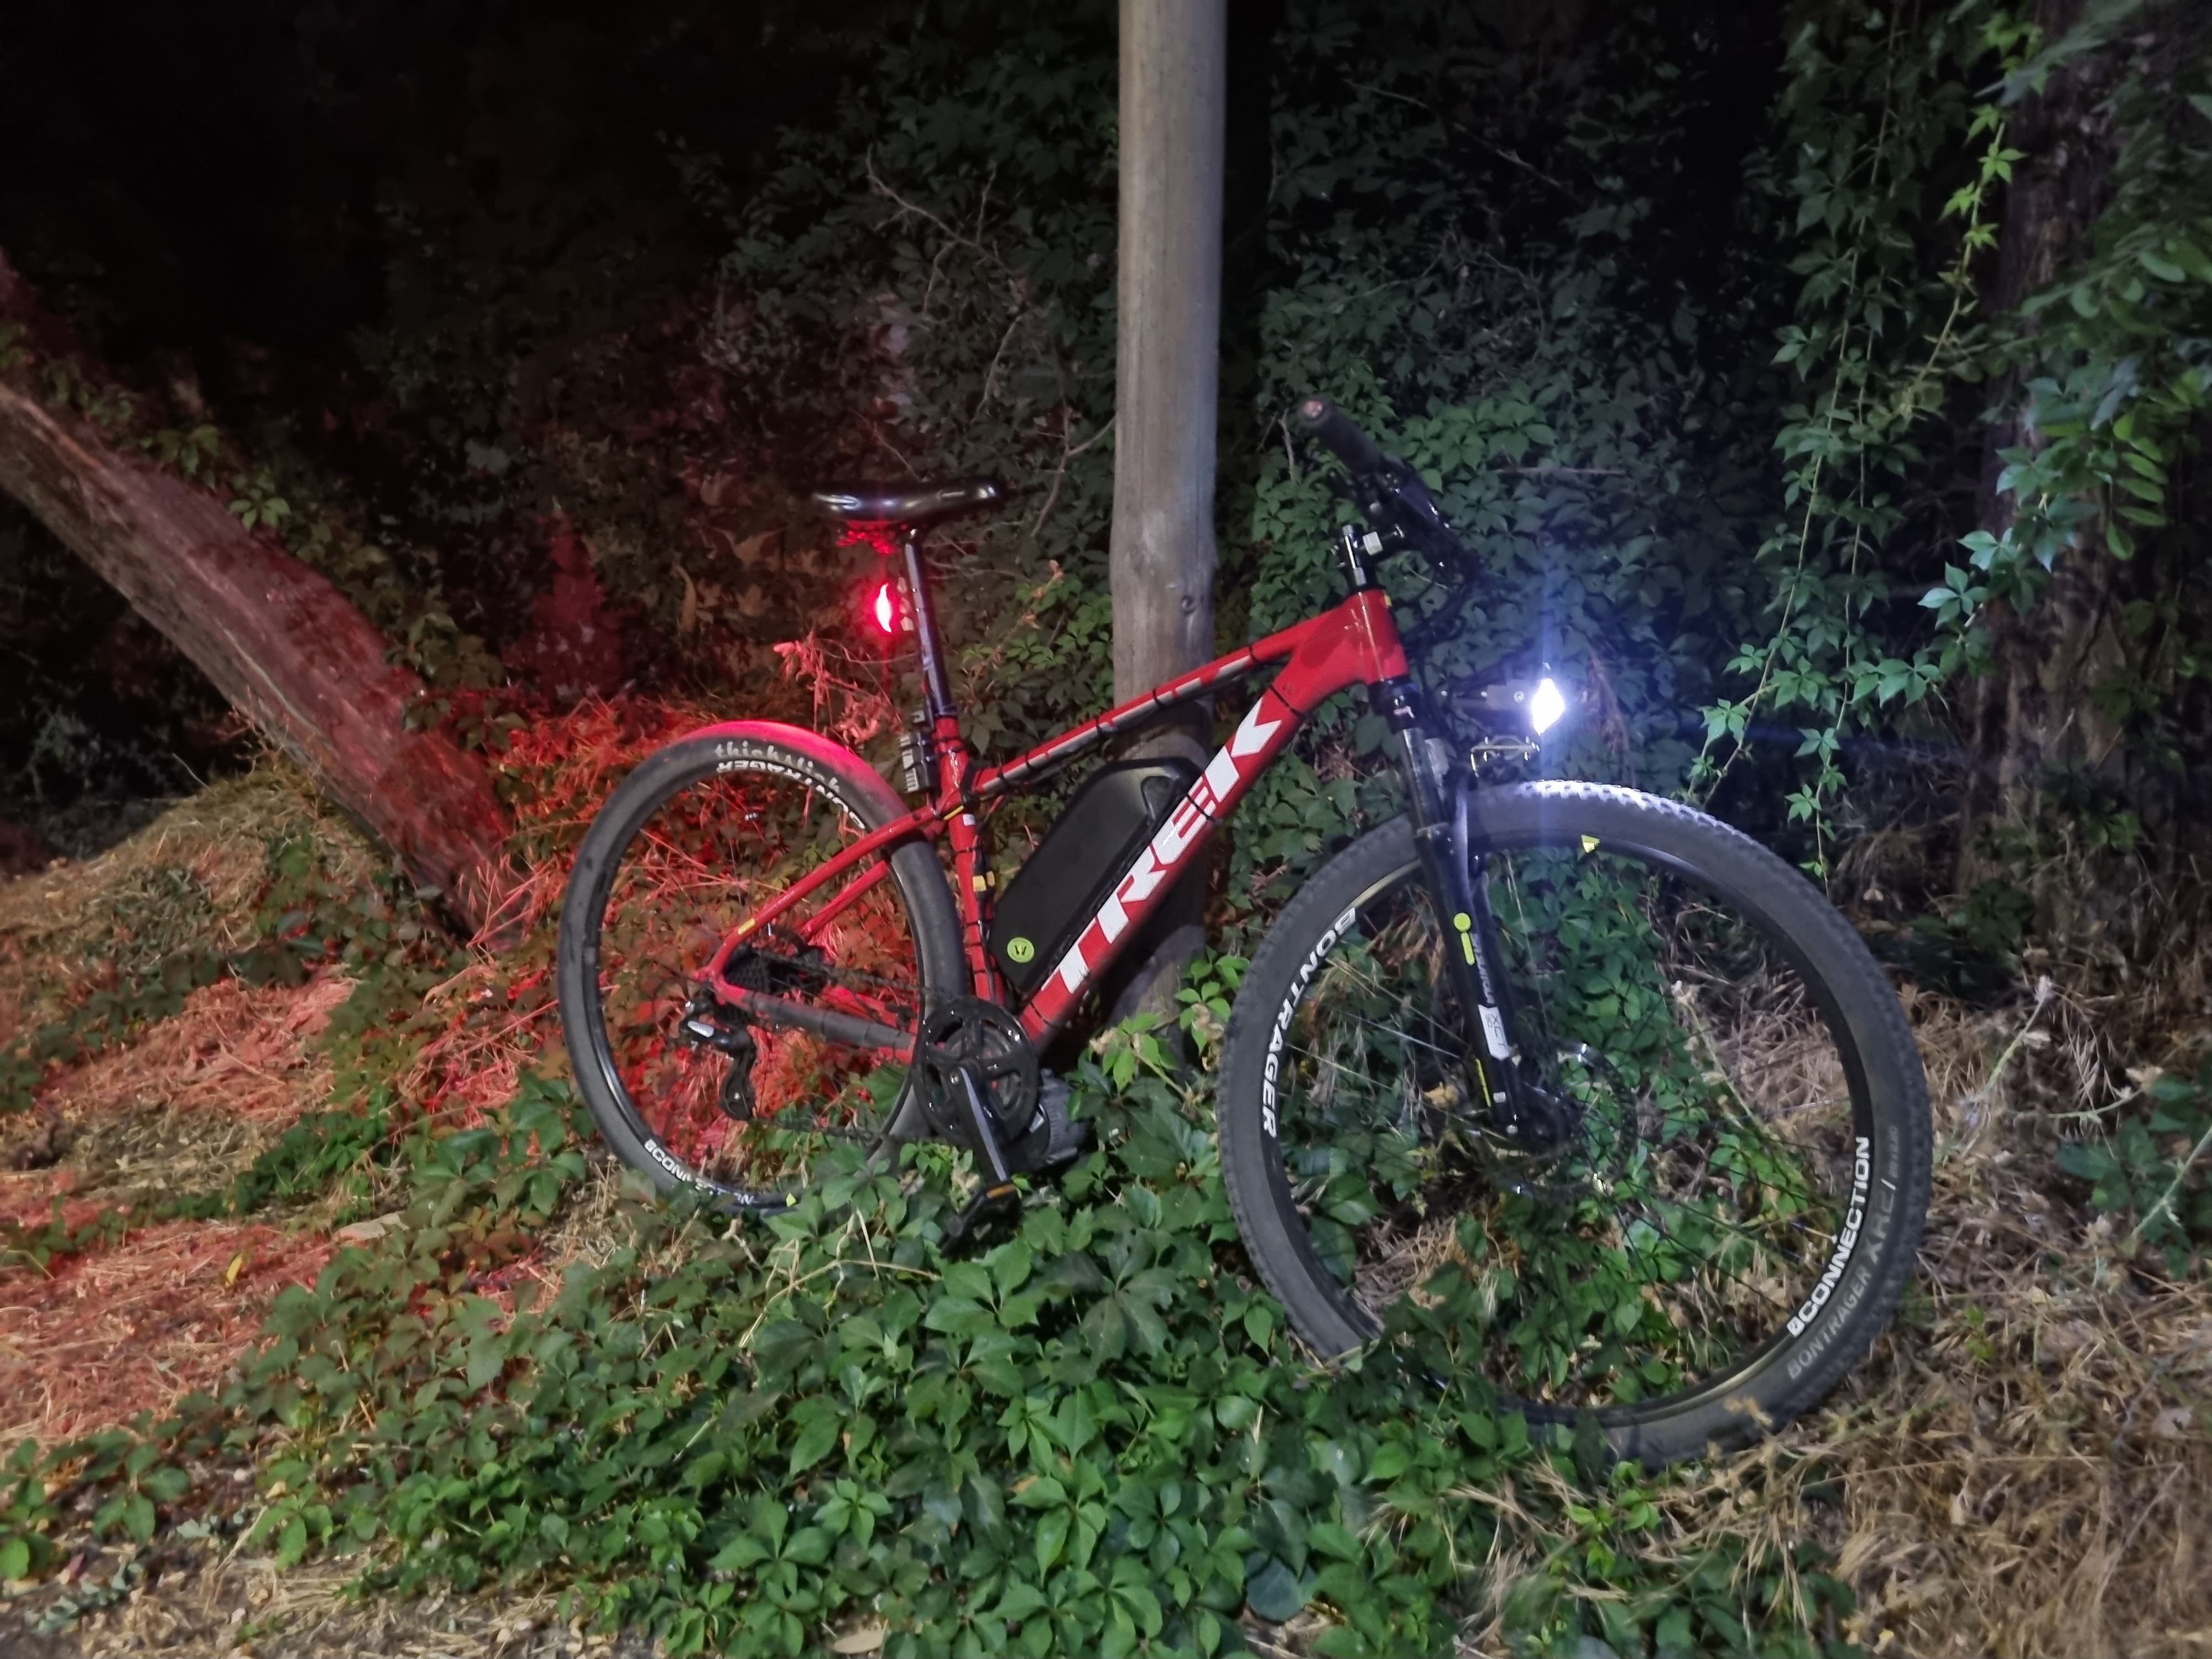
Another consideration was that ebike headlights and tail lights are expensive, so instead I got a $3 12V 5W red LED sold as a "led trailer side marker" for the taillight, and a $10 12V 10W LED "motorcycle fog light" from AliExpress for the headlight. I still plan on getting a proper StVZO compliant headlight, but I'm not in a hurry to do so.
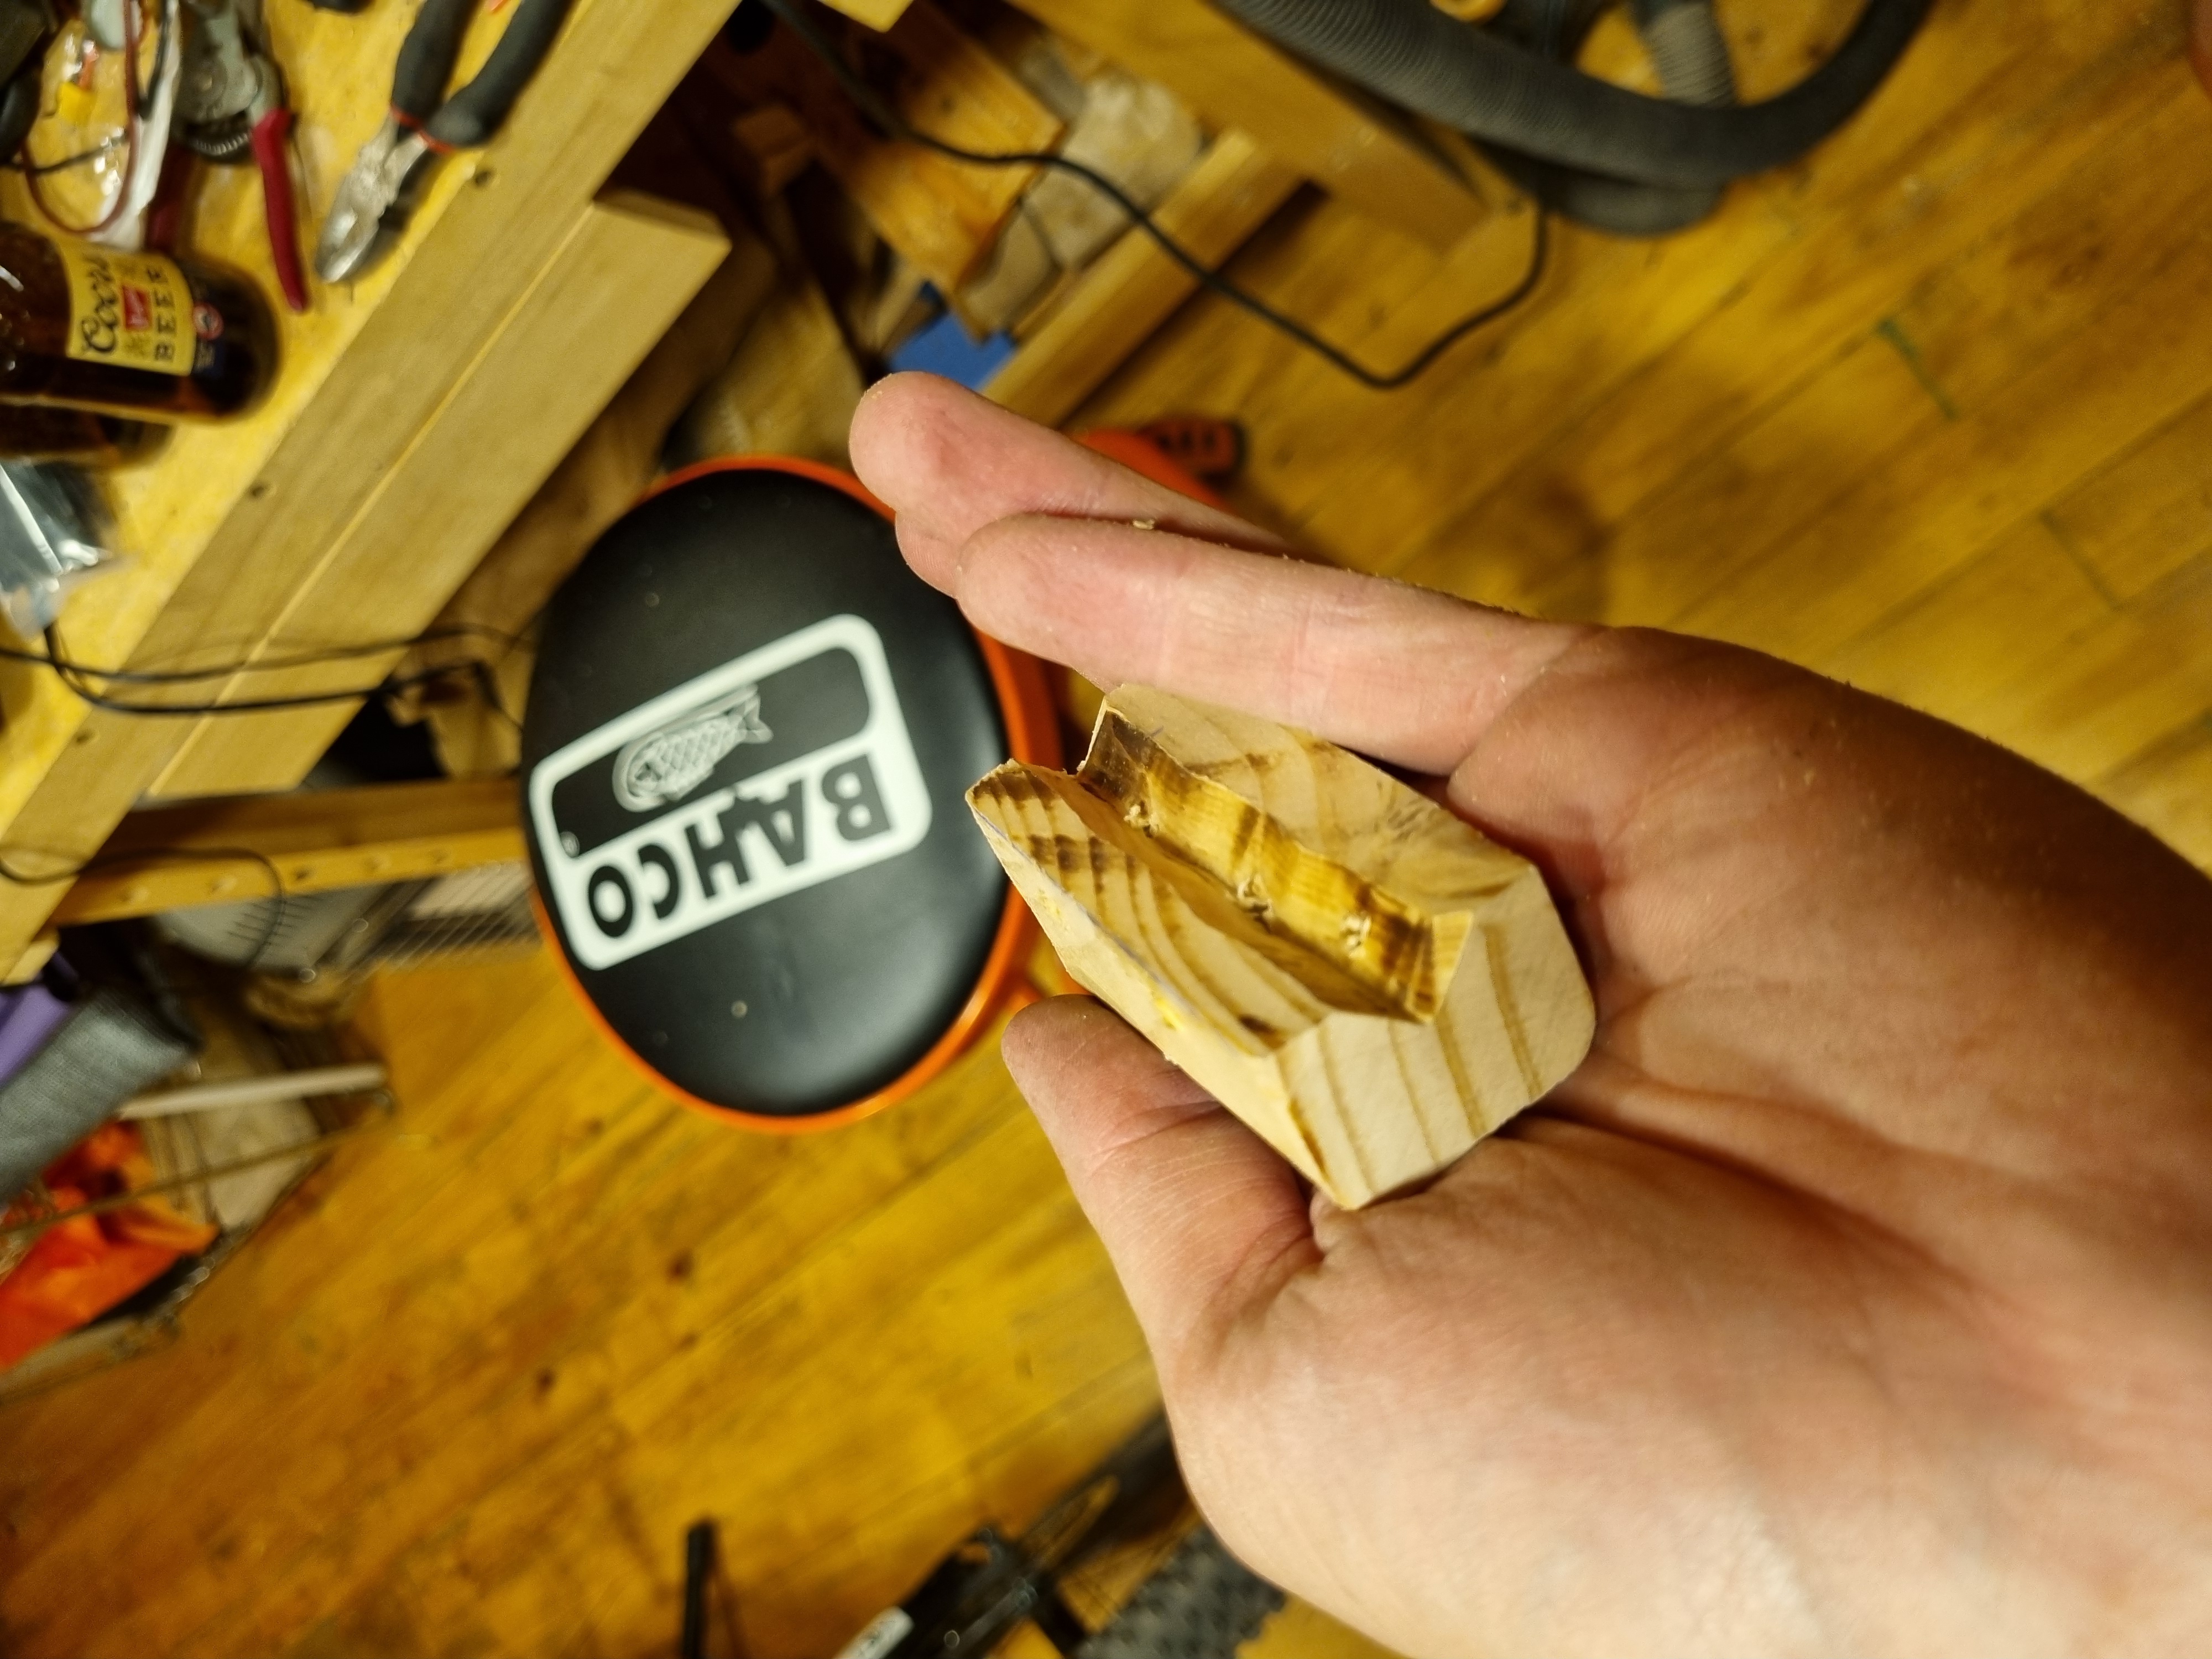
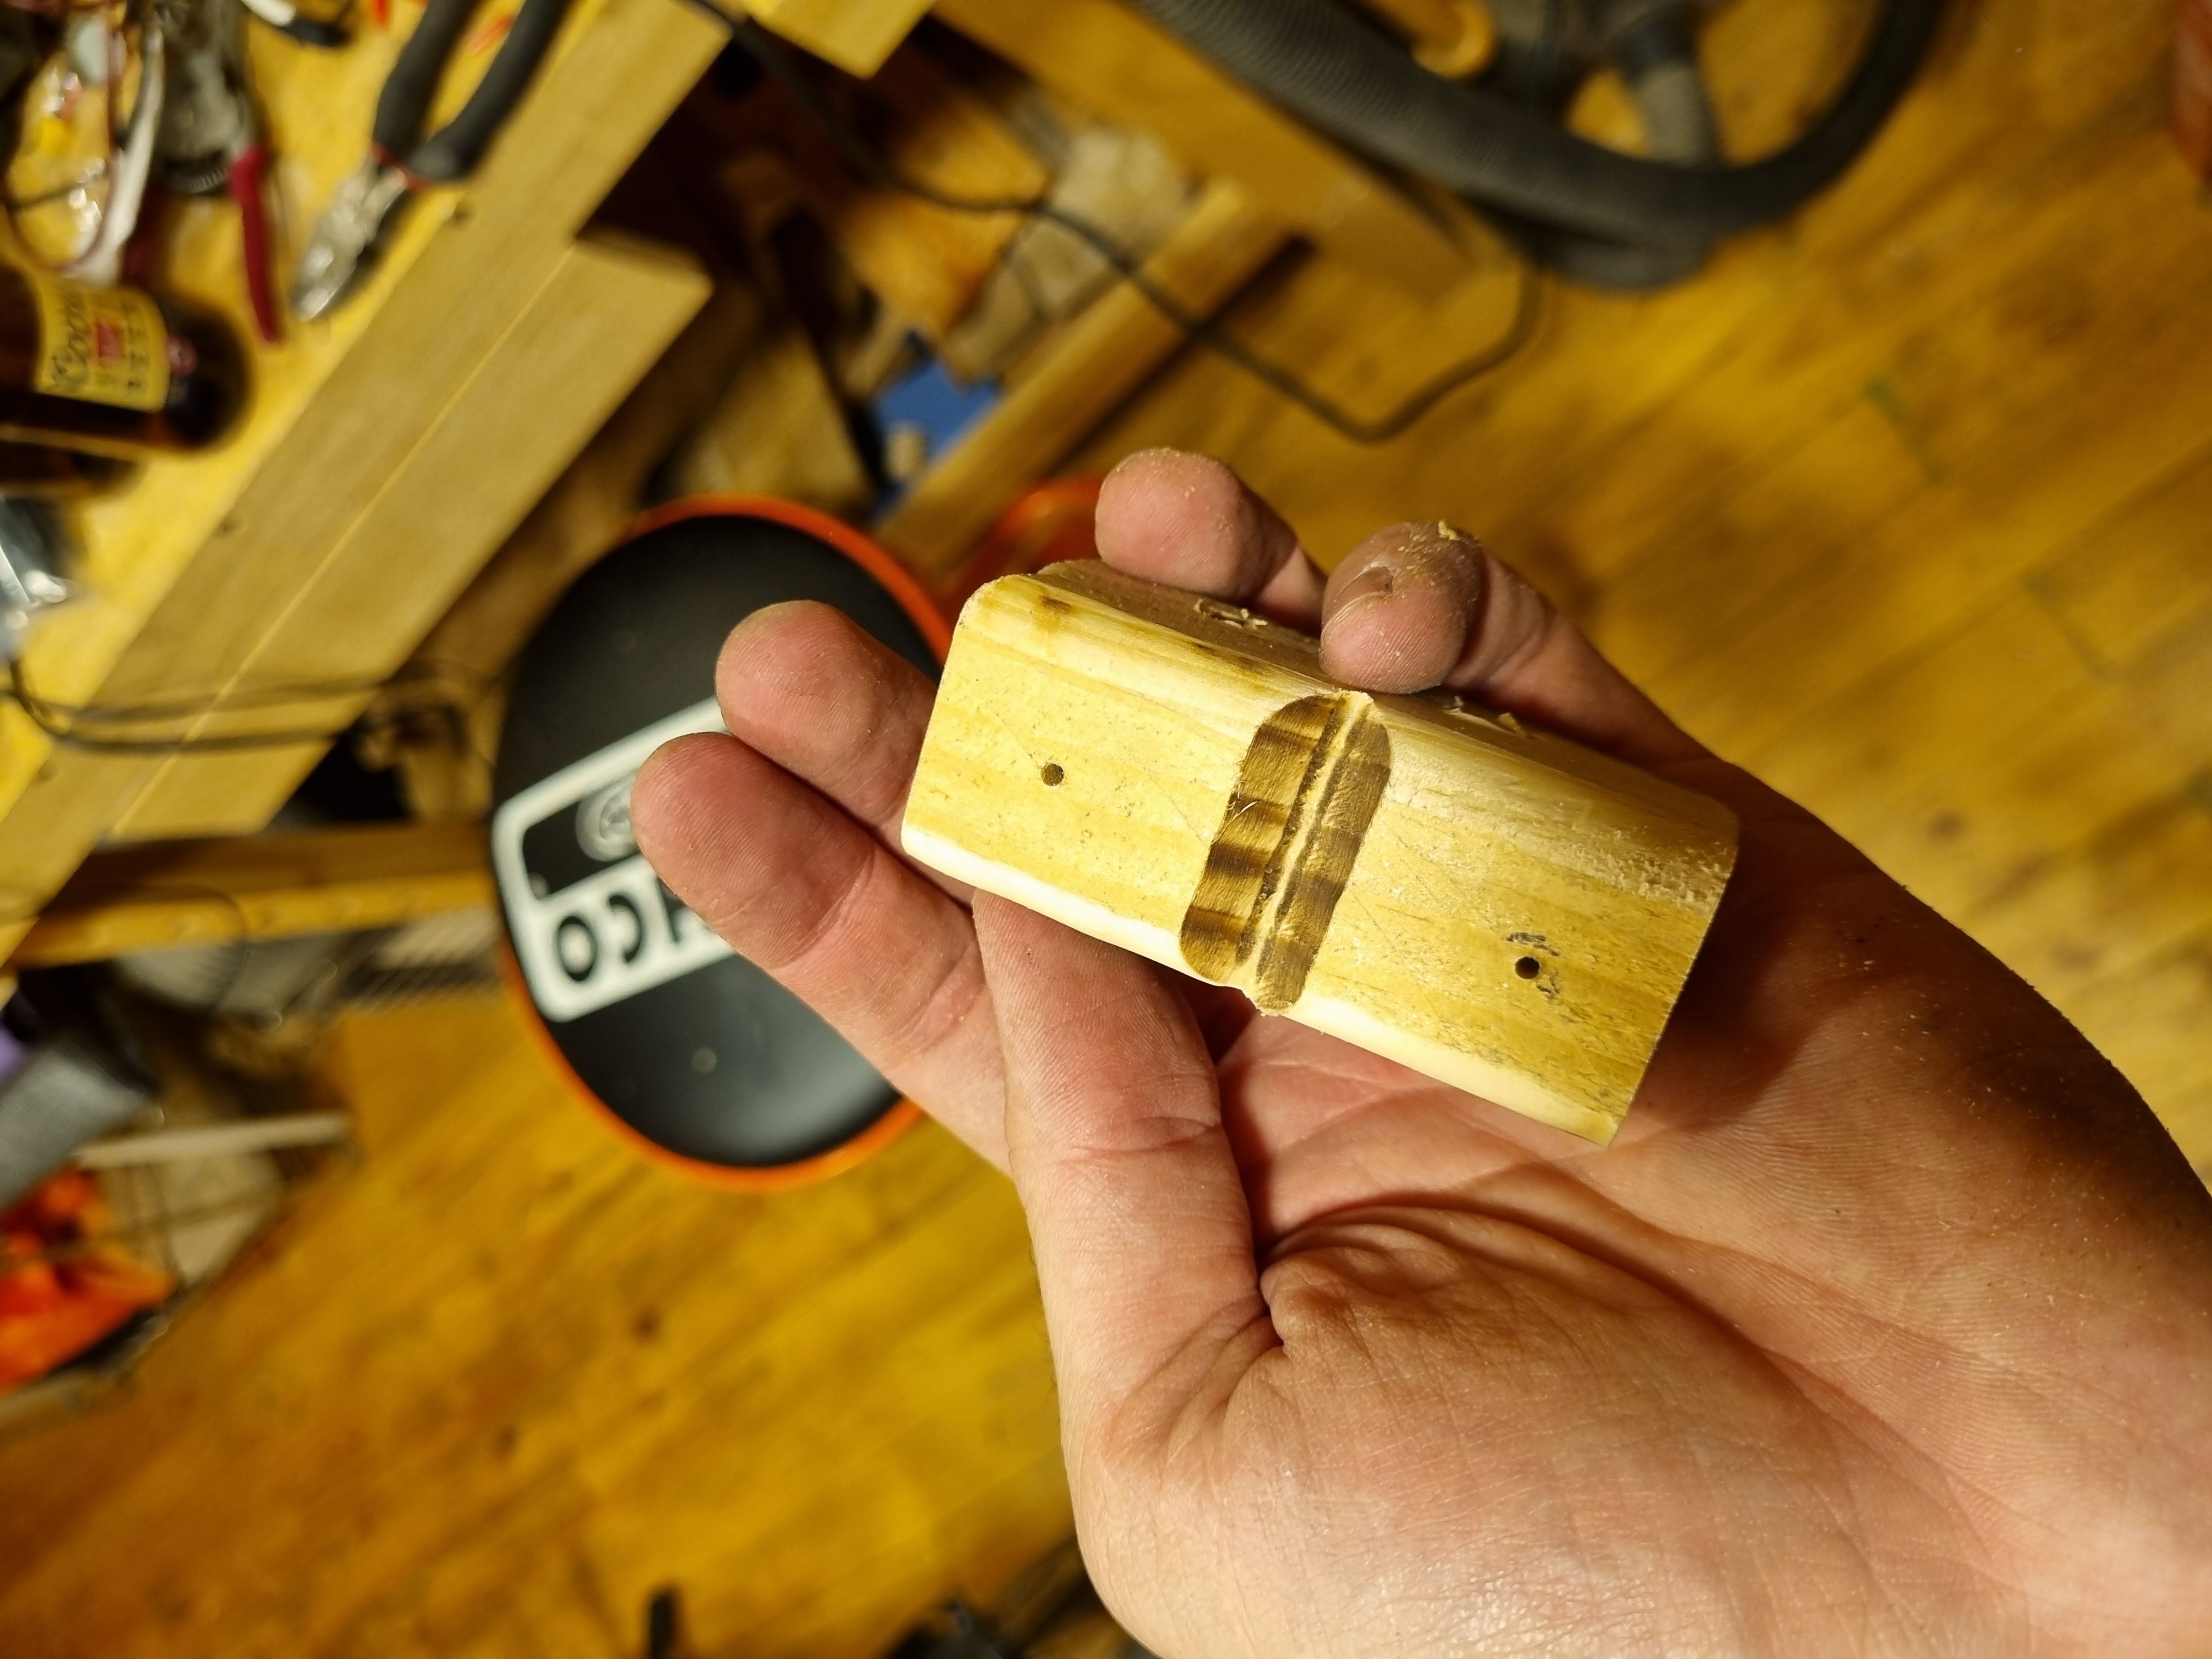
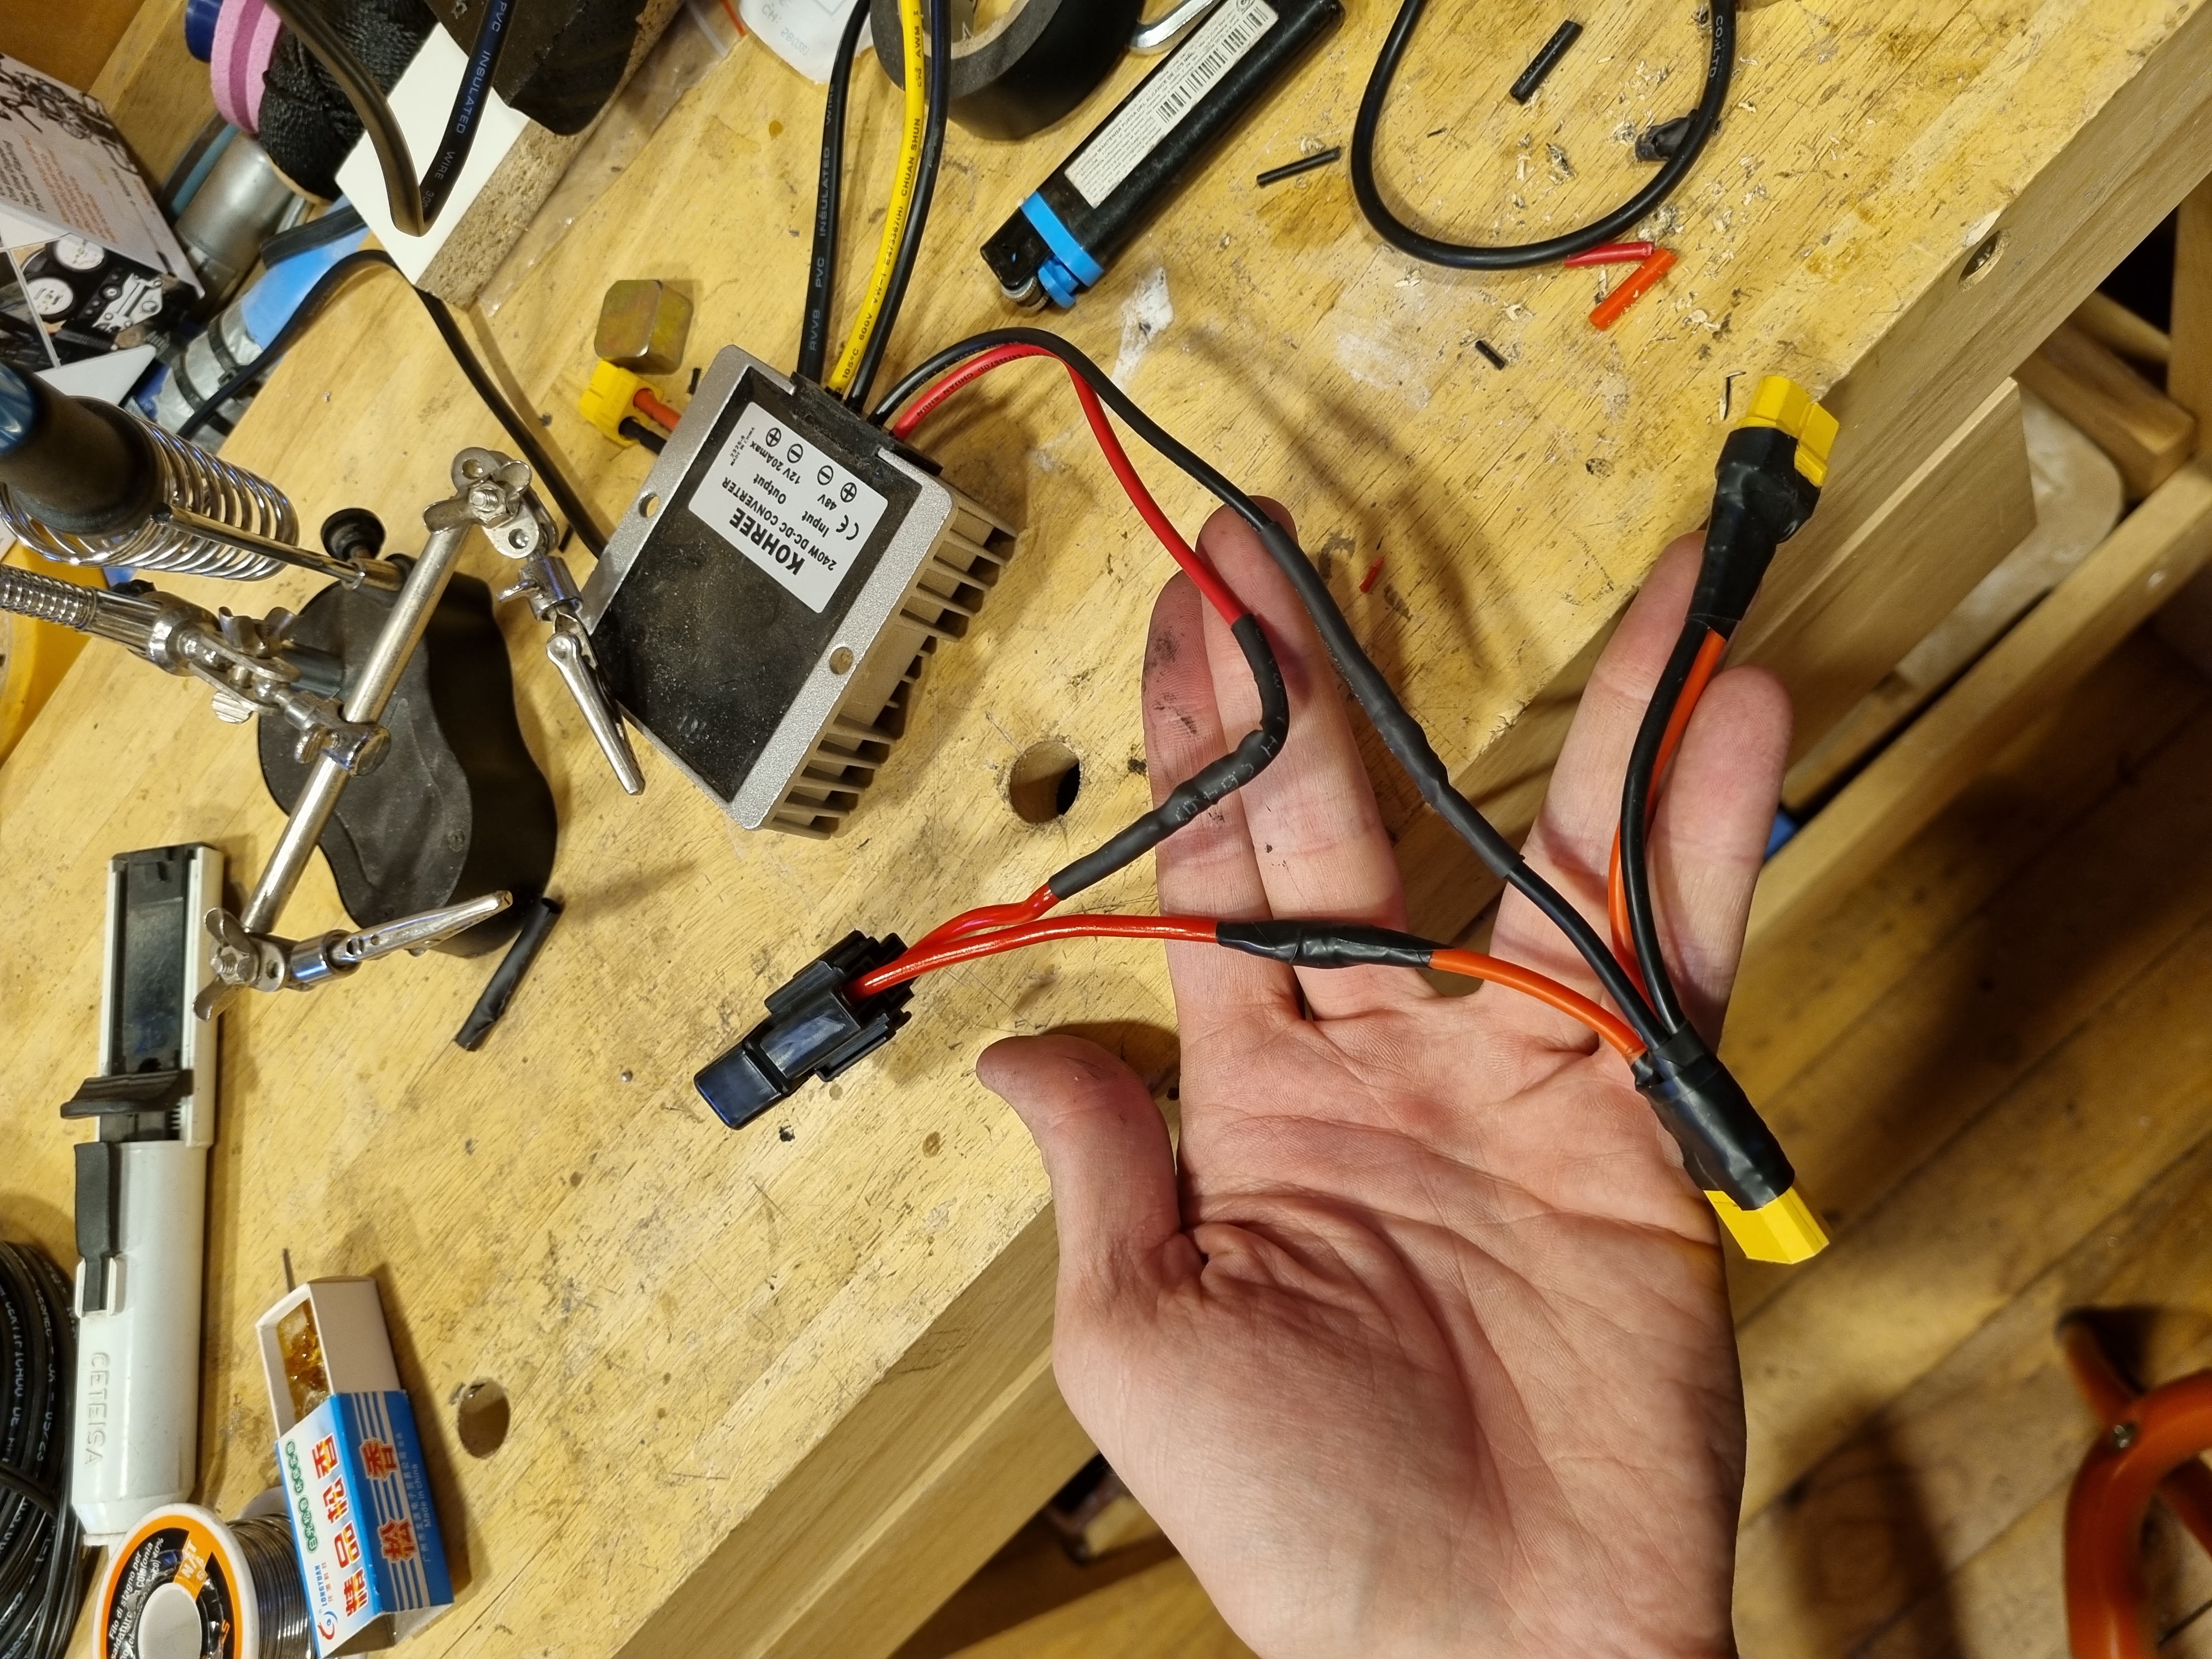
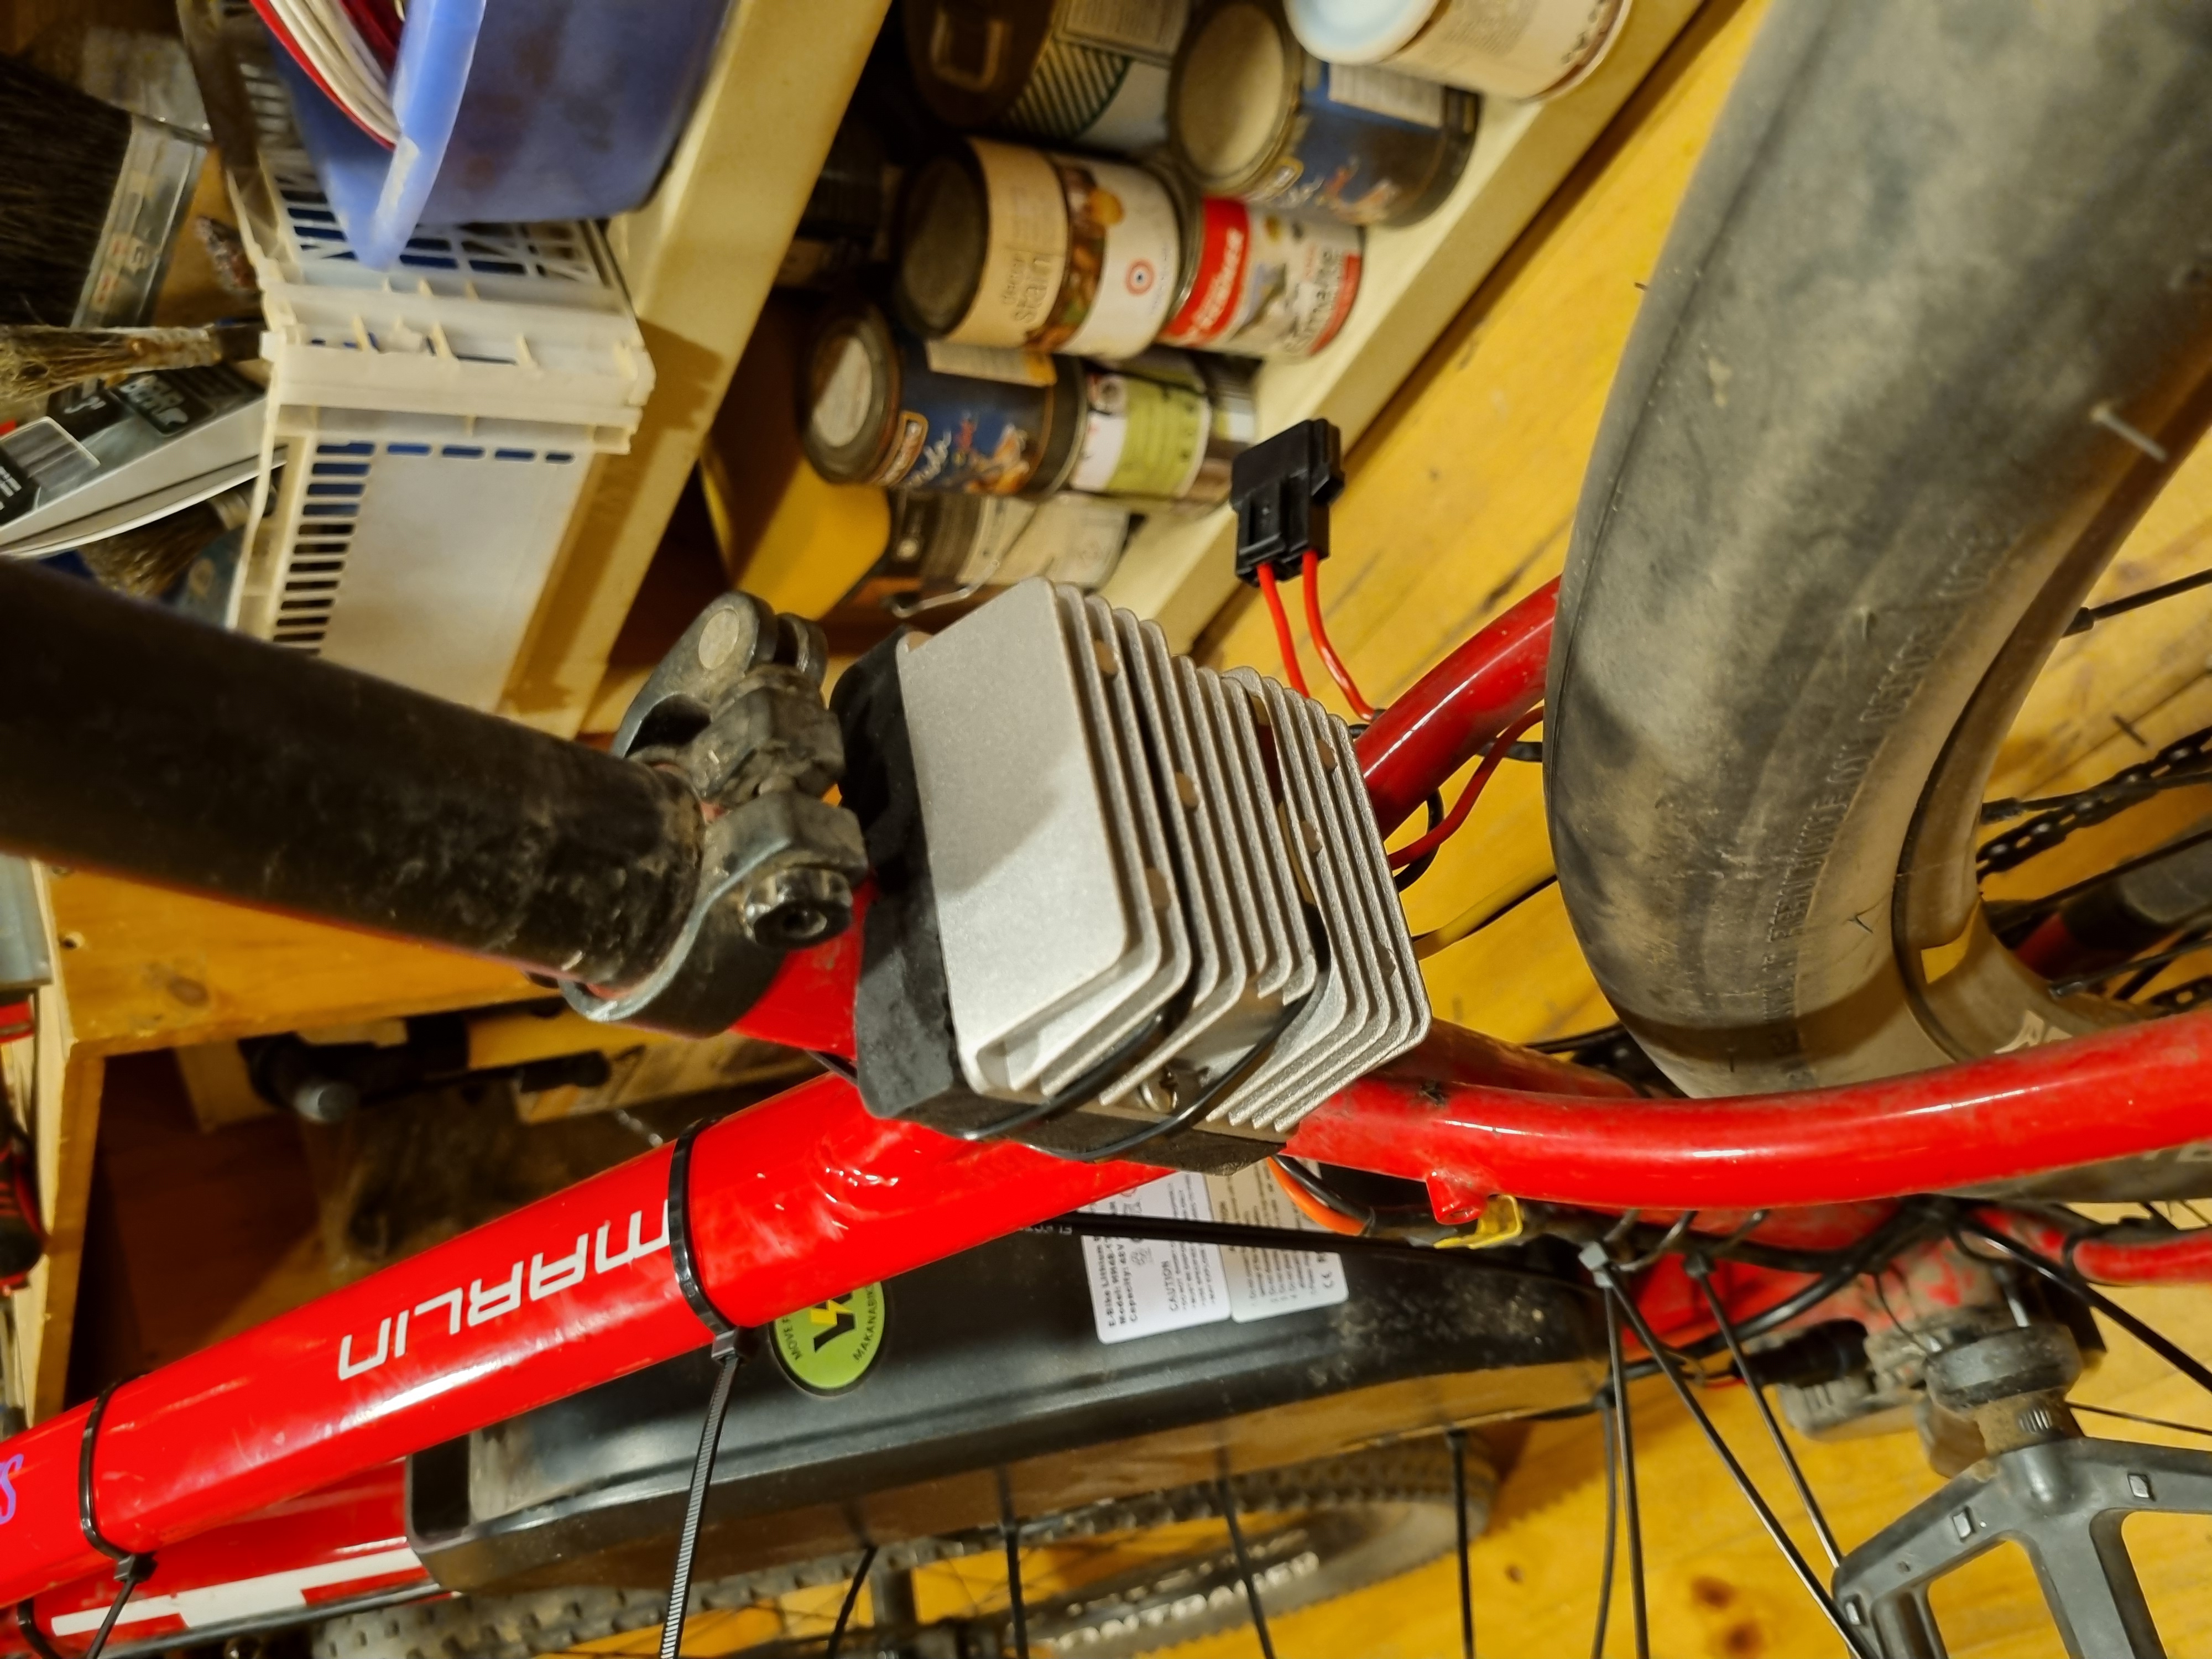
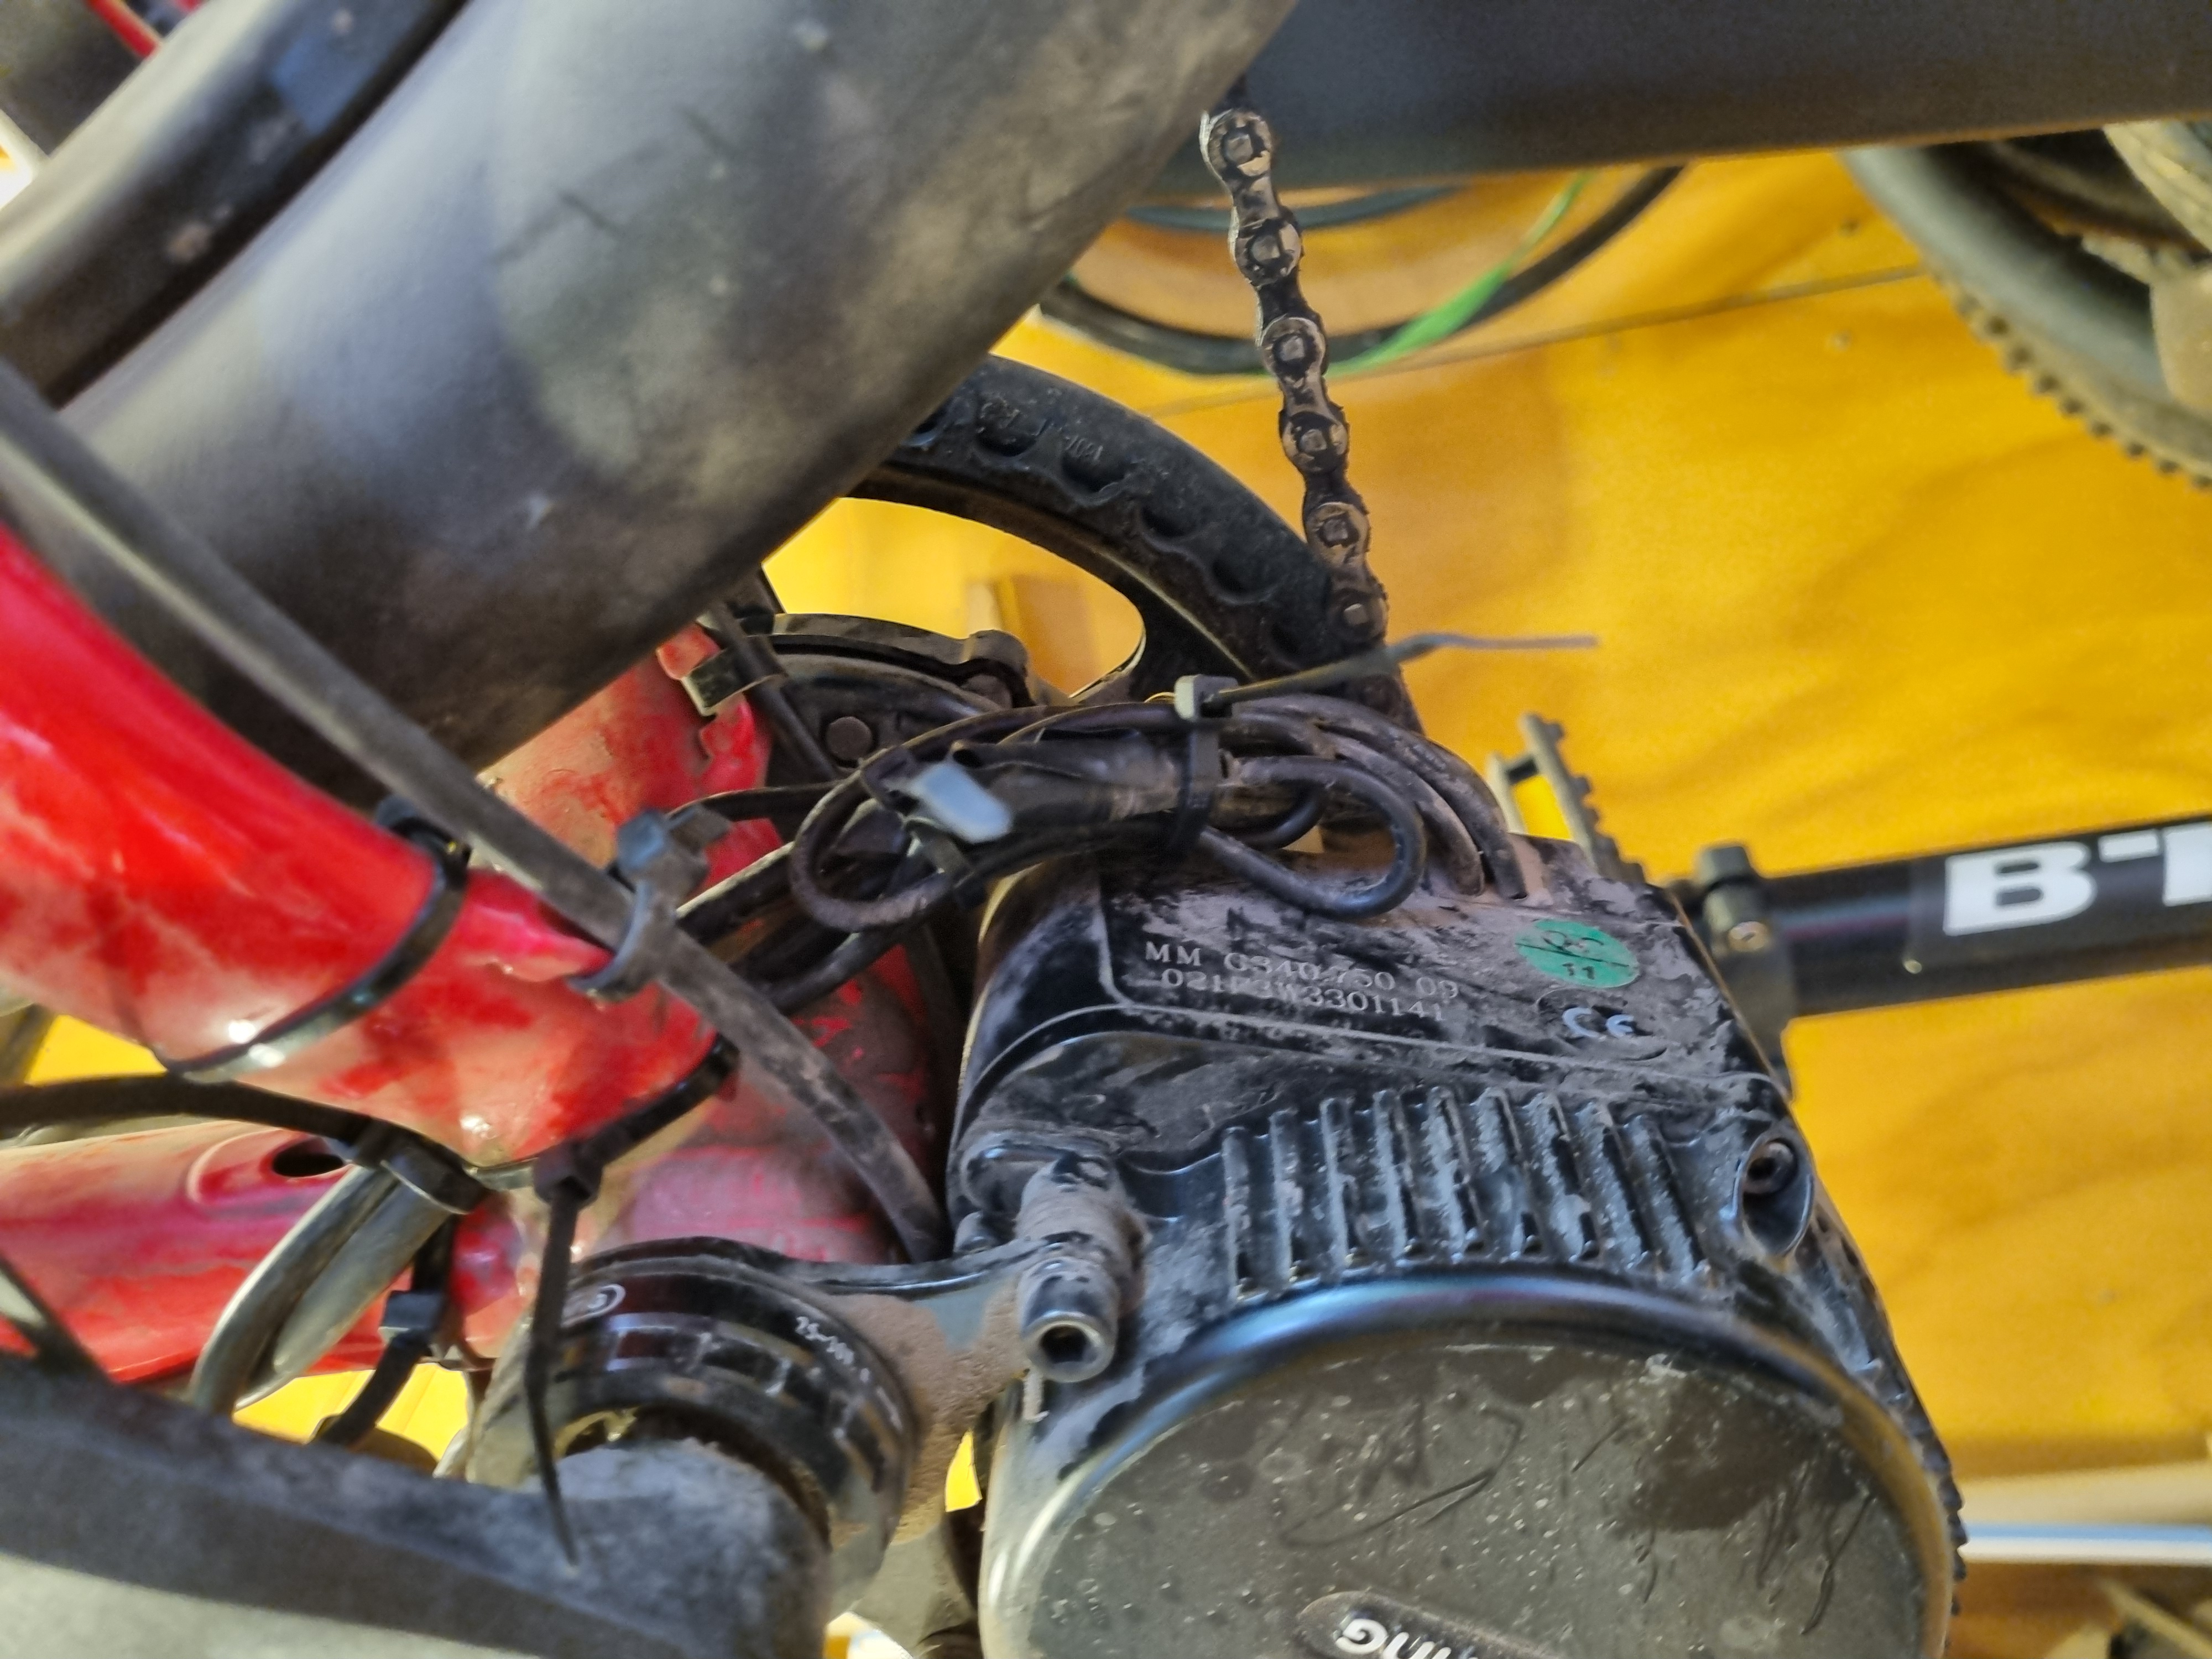
To step down the voltage fr0m 48 V to something more manageable, I bought a Kohree 48V to 12V DC-DC converter off Amazon, which is overspecced for this application, as it can provide up to 240W, but it came in a nice watertight enclosure and it looked sturdier than the other options I found. I made a small wooden adaptor to which I could screw it, and then zip-tie it to the seat tube. I also got an inline fuse holder and a 2A fuse, just in case something goes wrong, even though the DC-DC converter is supposed to have short-circuit protection.
The wiring was done with stranded AWG 20 cable, except for the XT-60 Y-splitter to the motor and the fuse holder, which are AWG 14 and used heat shrink on every soldered connection. Just before each light, I installed quick disconnect connectors so I could easily remove them if I needed to.

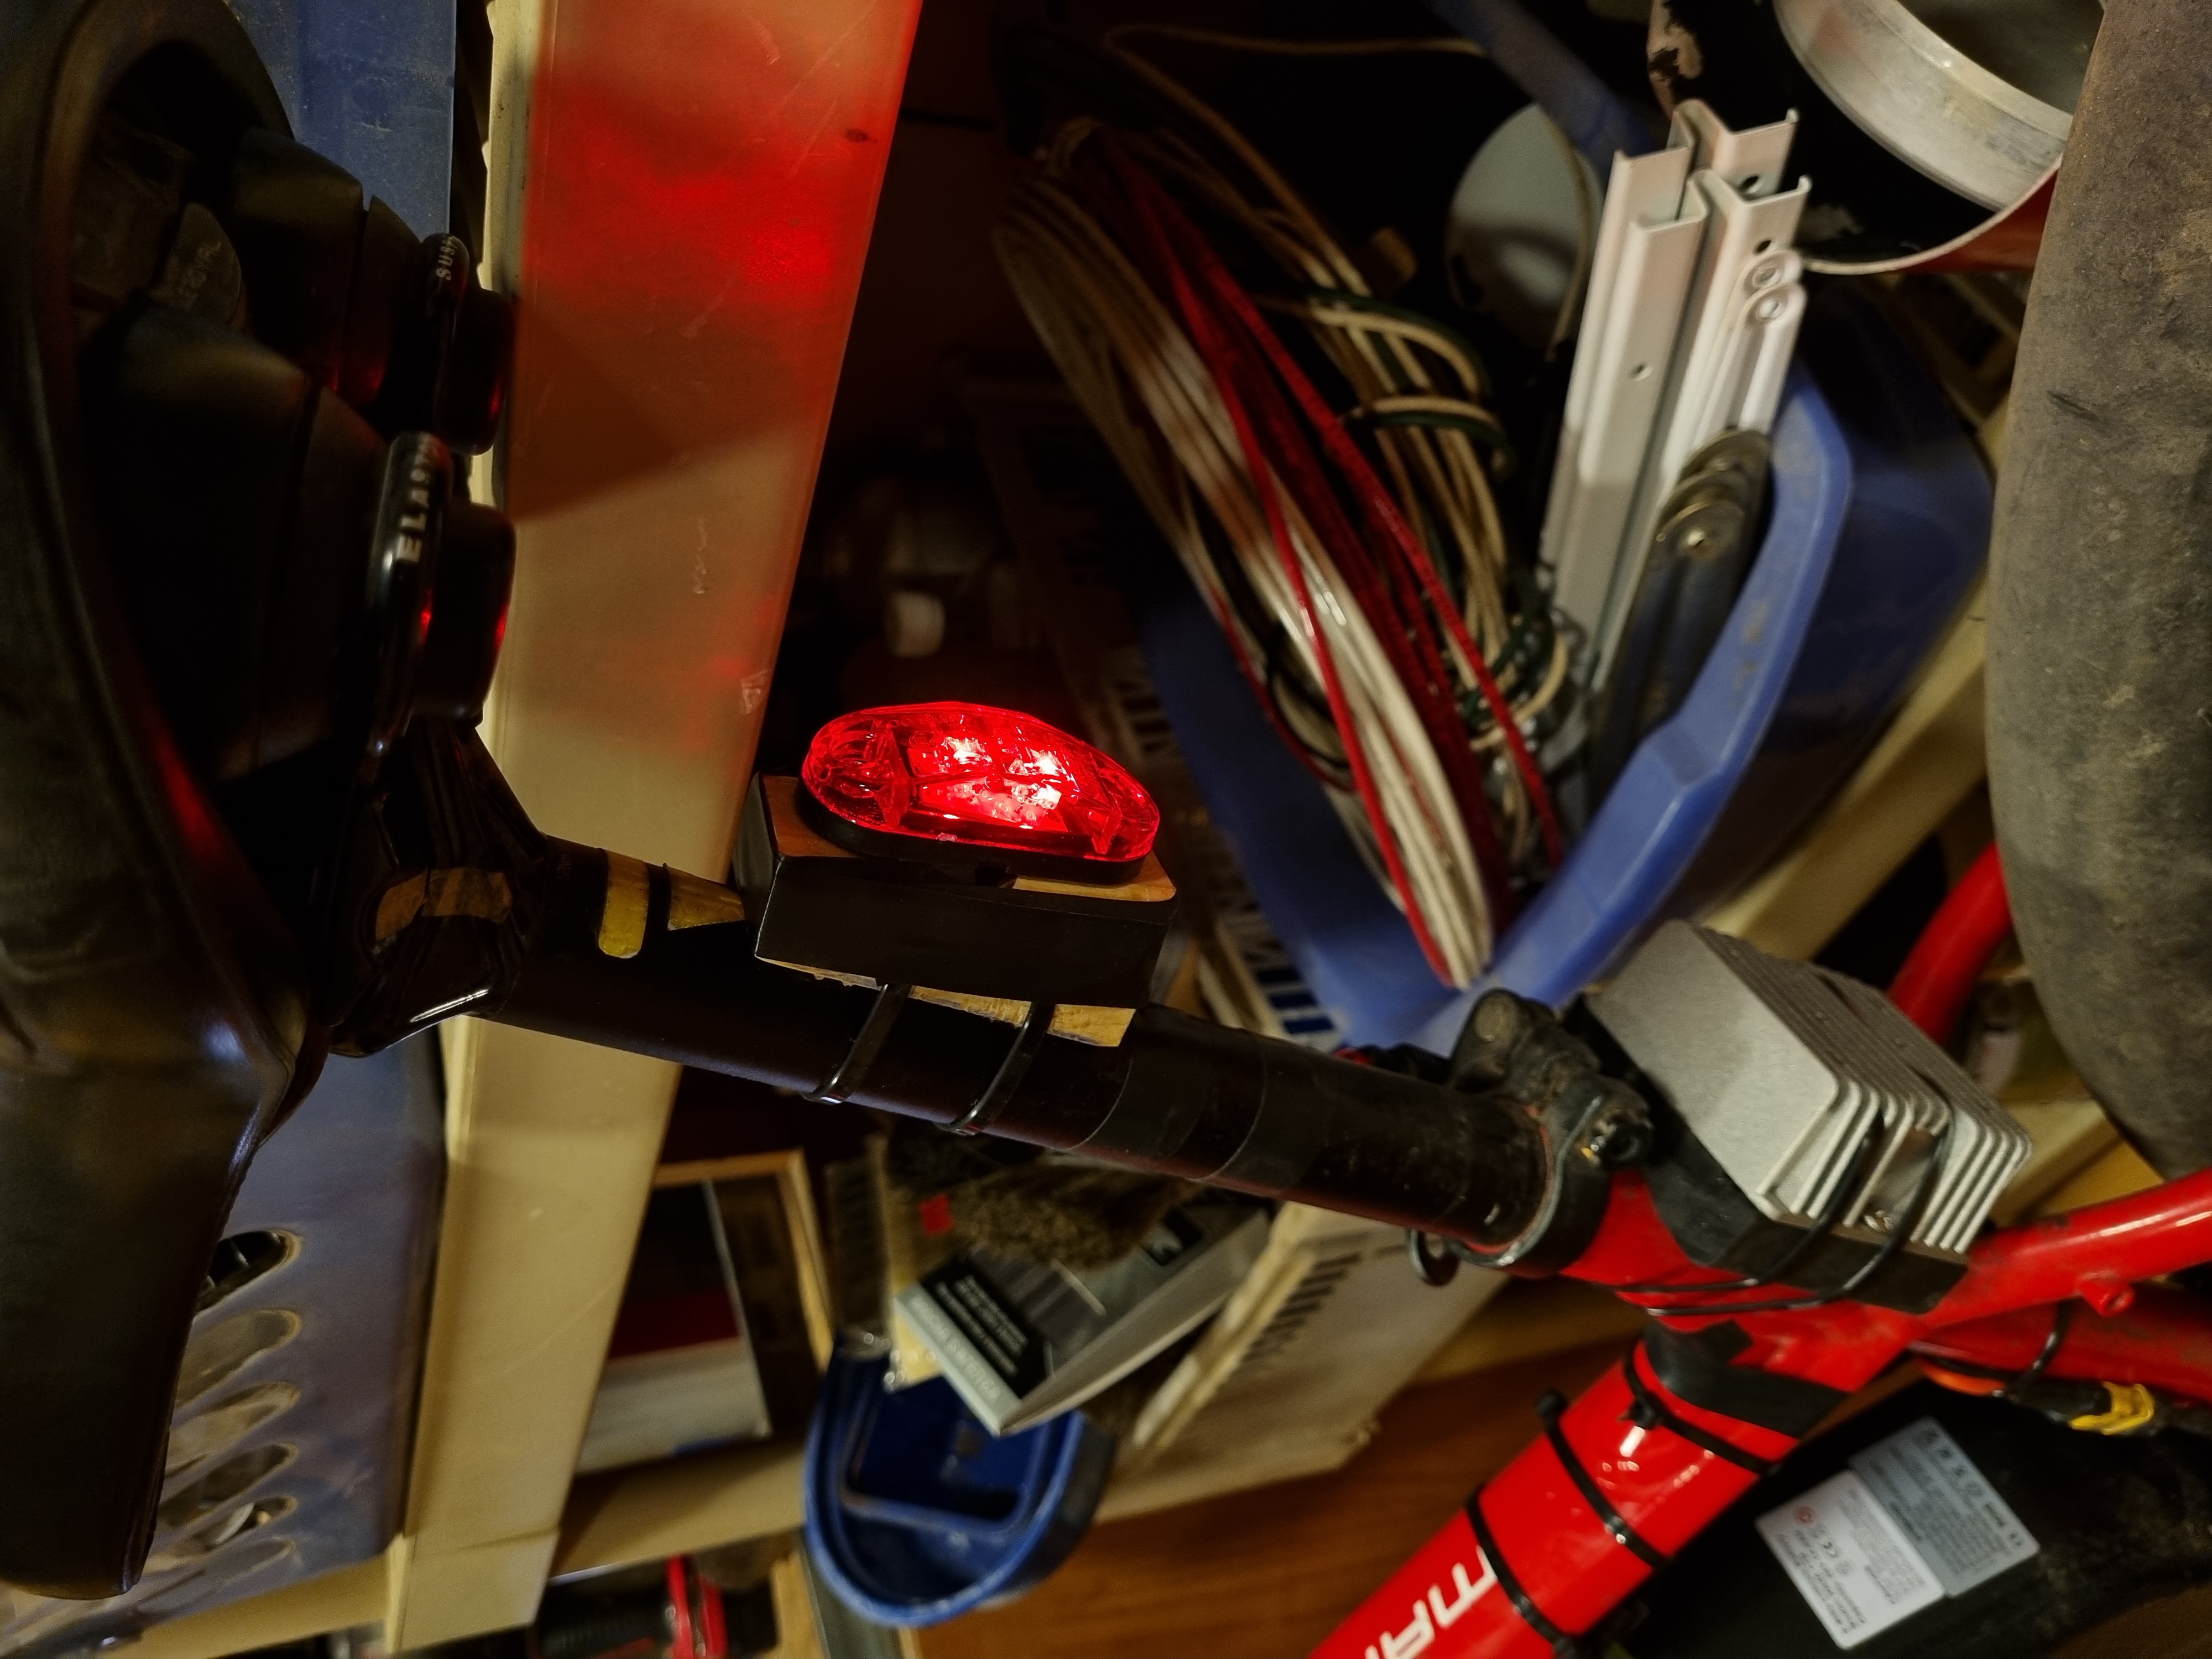
There's a cable run from the DC-DC converter mounted on the seat tube, to the handlebar switch, where it splits in two, and one pair of cables goes to the front light, and another pair goes to the rear light. All of these cables are run under the top tube and held in place with zip ties.
The Y-splitter with the fuse holder tucks nicely in the joint between the top tube and the seat tube, which is connected to a cable coming up from the battery pack and another cable going back down to the motor.
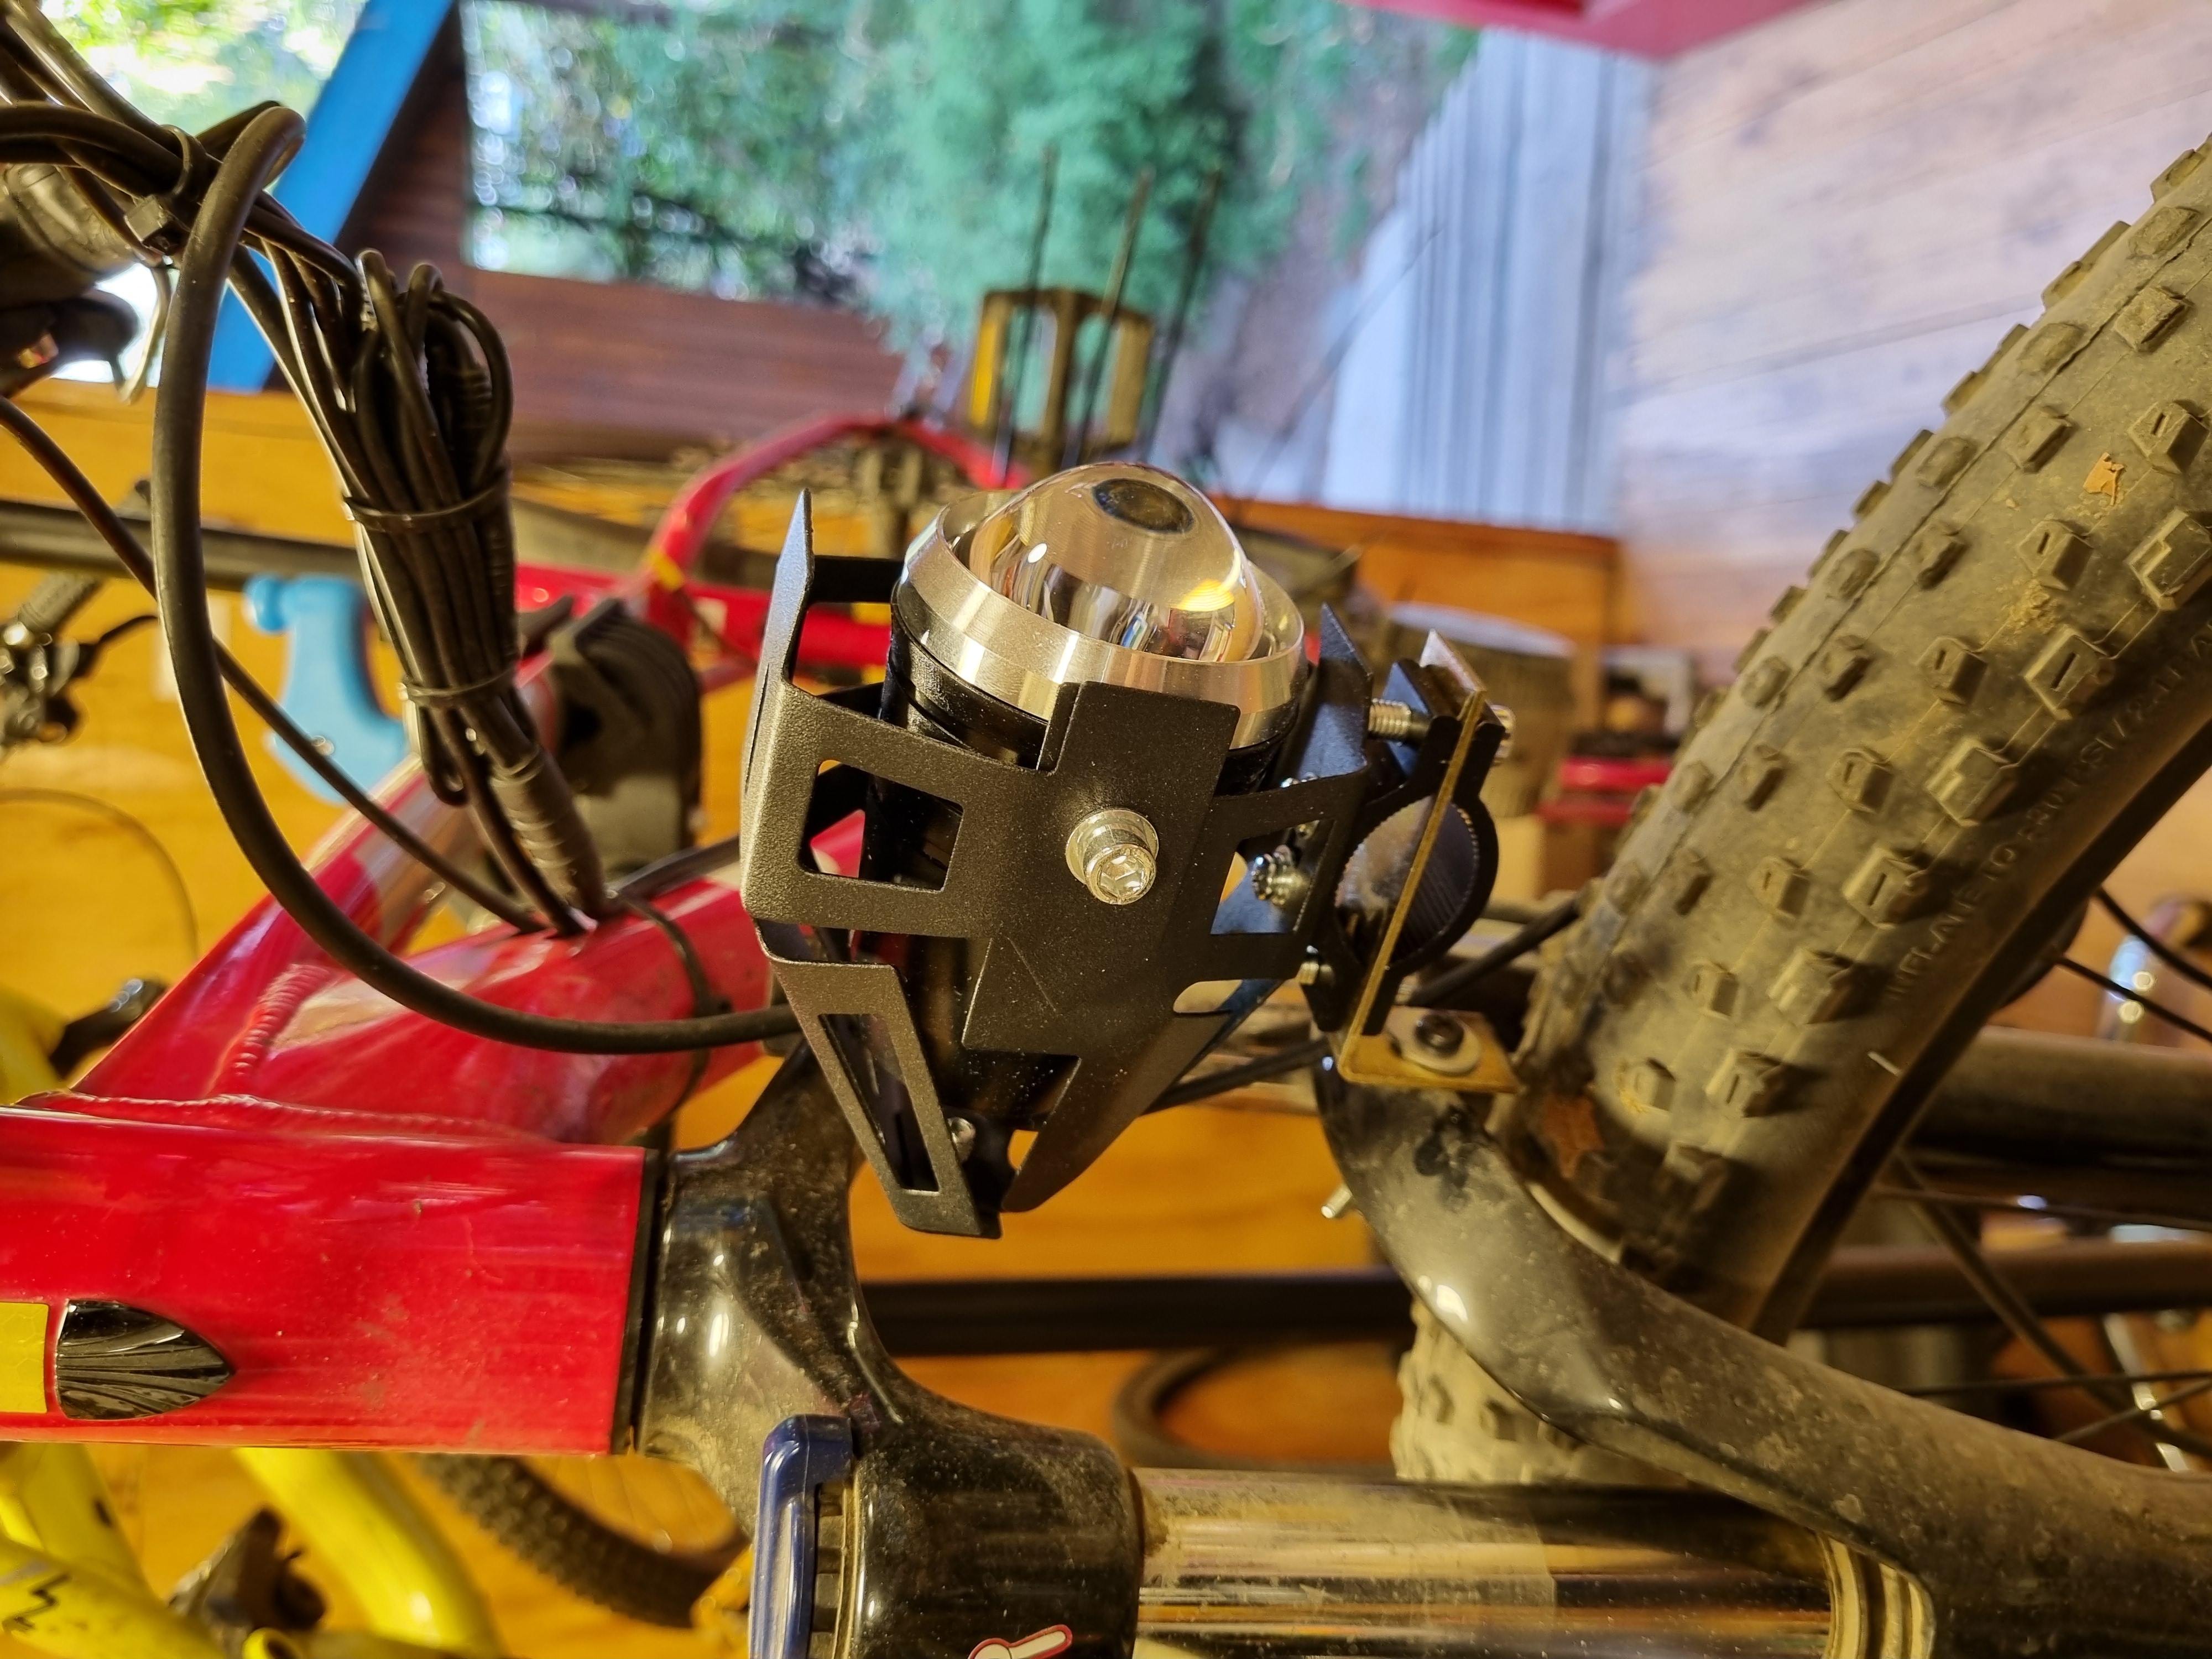
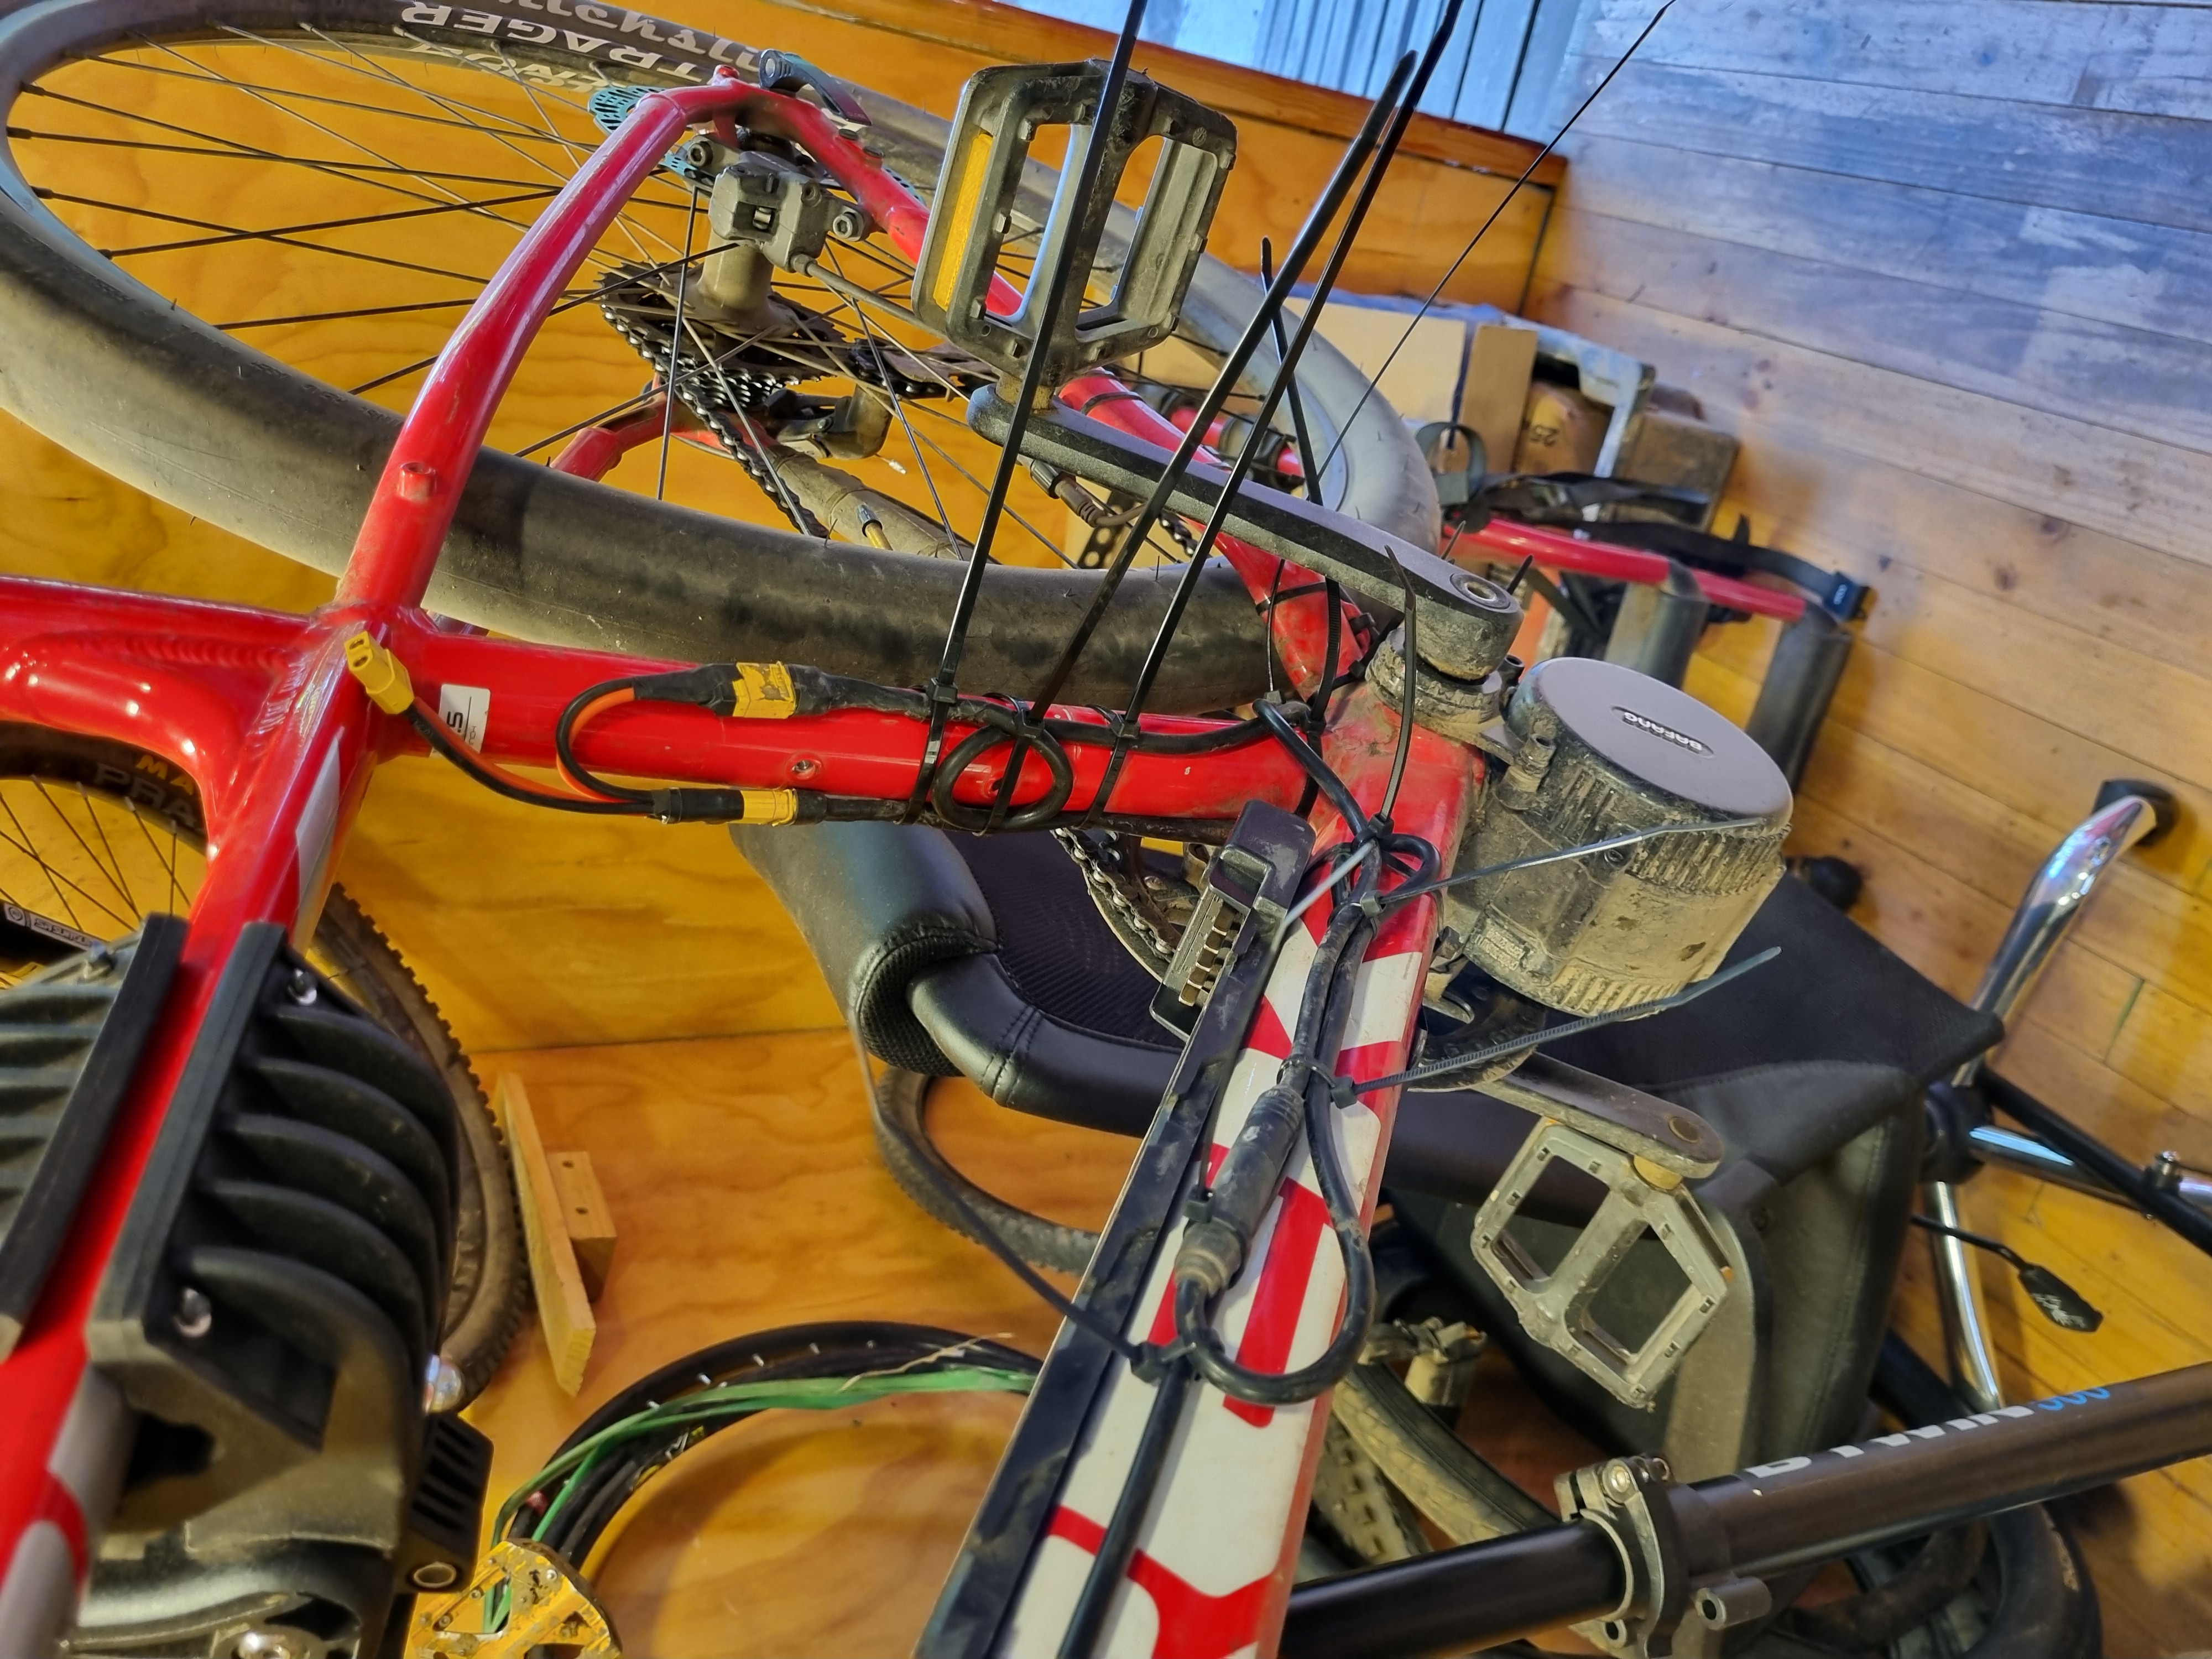
I had to get a bit creative with the front light, as the housing was rather large and I did not want it to be in the way of the handlebars, so I used a metal L bracket to mount it to the fork crown. The DC-DC converter is screwed to a wooden bracket and then zip-tied to the seat tube.
The full list of materials was:
- 5W red LED "trailer side marker"
- 10W LED "motorcycle fog light"
- Kohree 48V to 12V DC-DC converter
- Inline car fuse holder
- 2A fuses
- AWG 20 stranded cable pair
- Quick disconnect connectors
- AWG 14 XT-60 Y-splitter dual male, single female
- Handlebar switch
- Metal L bracket and a screw I had lying around
- Two blocks of wood
- Zip ties (lots of them)
- Assorted heat shrink tubes
Plus a few tools, such as a soldering iron, multimeter, drill, saw, screwdriver, pliers, wood router and a heat gun. The total cost, not including the tools, was around $70, and it took me about 3 hours to complete the installation.